Dec
17
In the last article I discussed the benefits of an 18-hole bridge. The next question might be, how does one go about stringing one up? Here is an easy step-by-step guide. Let’s start by looking at the hole configuration. There are 3 holes for each string. The left upper hole as well as bottom hole go all the way through the tie block. The top right hole goes half way into the tie block and is used to capture the string end.
In the guide below we are going to string the 4th (D) string.
Step 1 – Start the string-up.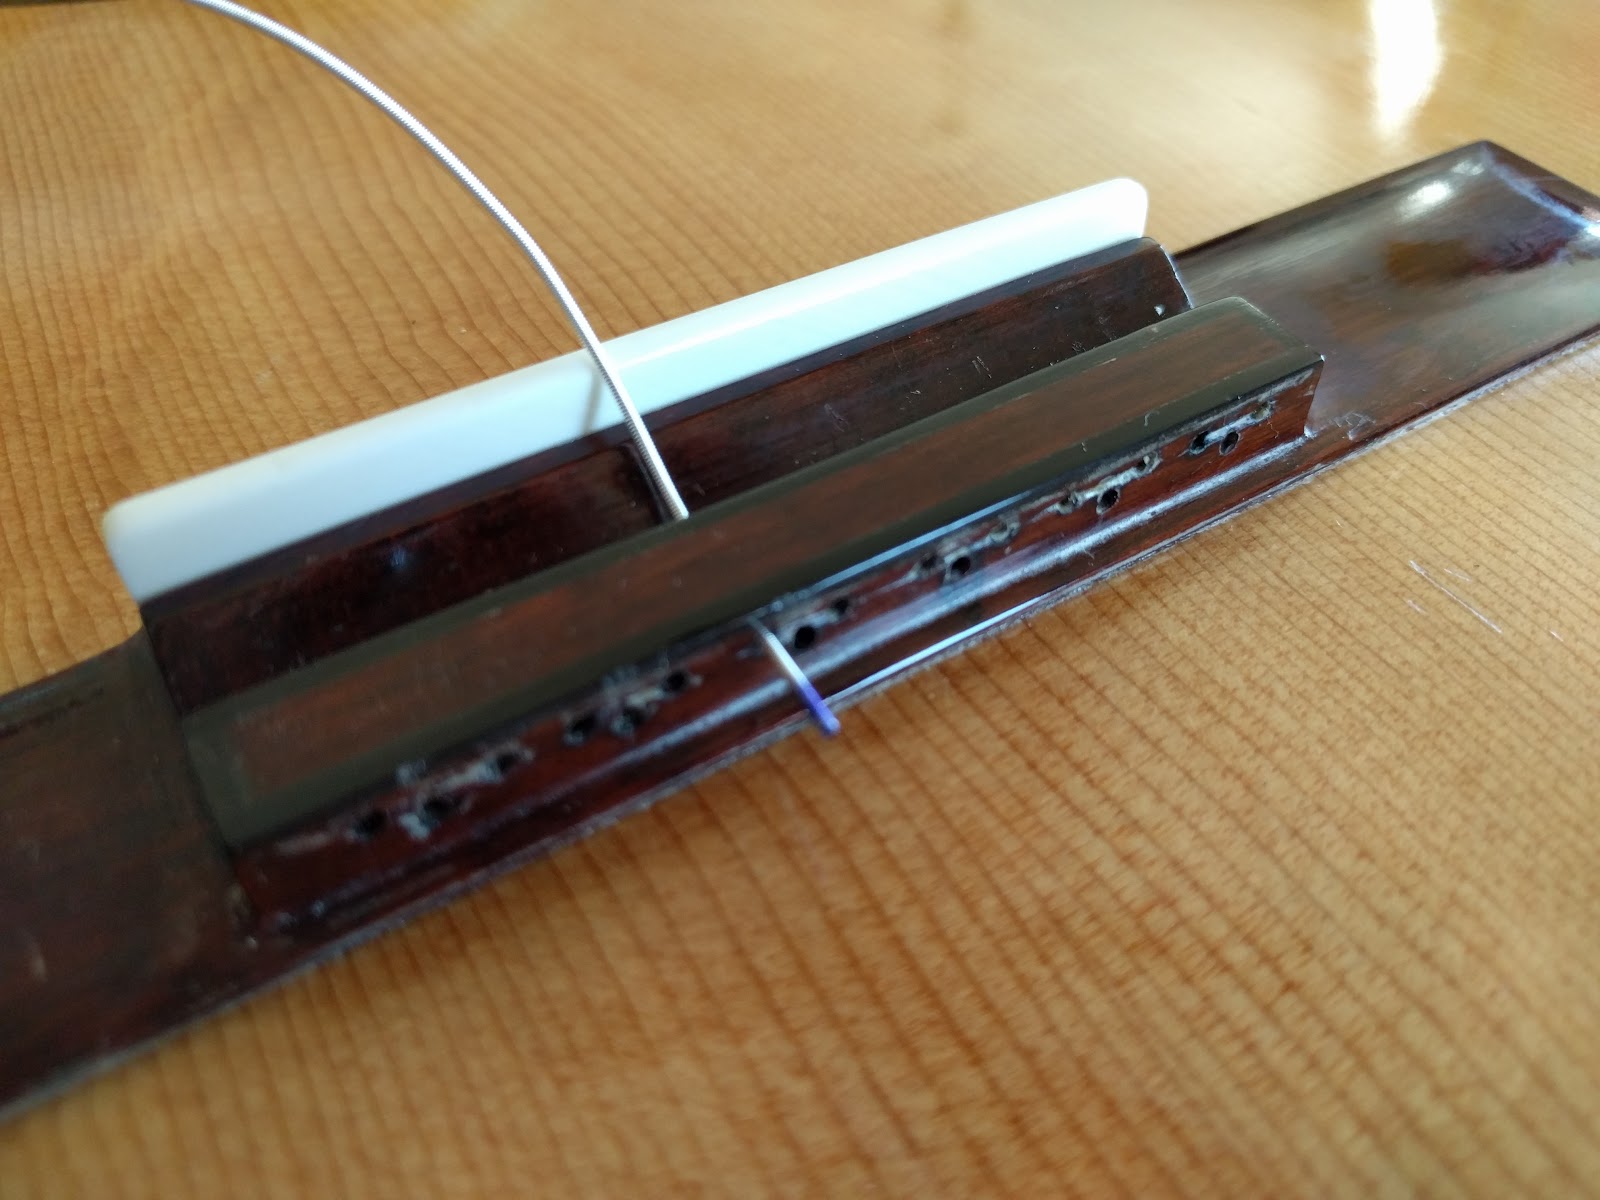
From the front of the tie block, insert the string in the bass-side hole.
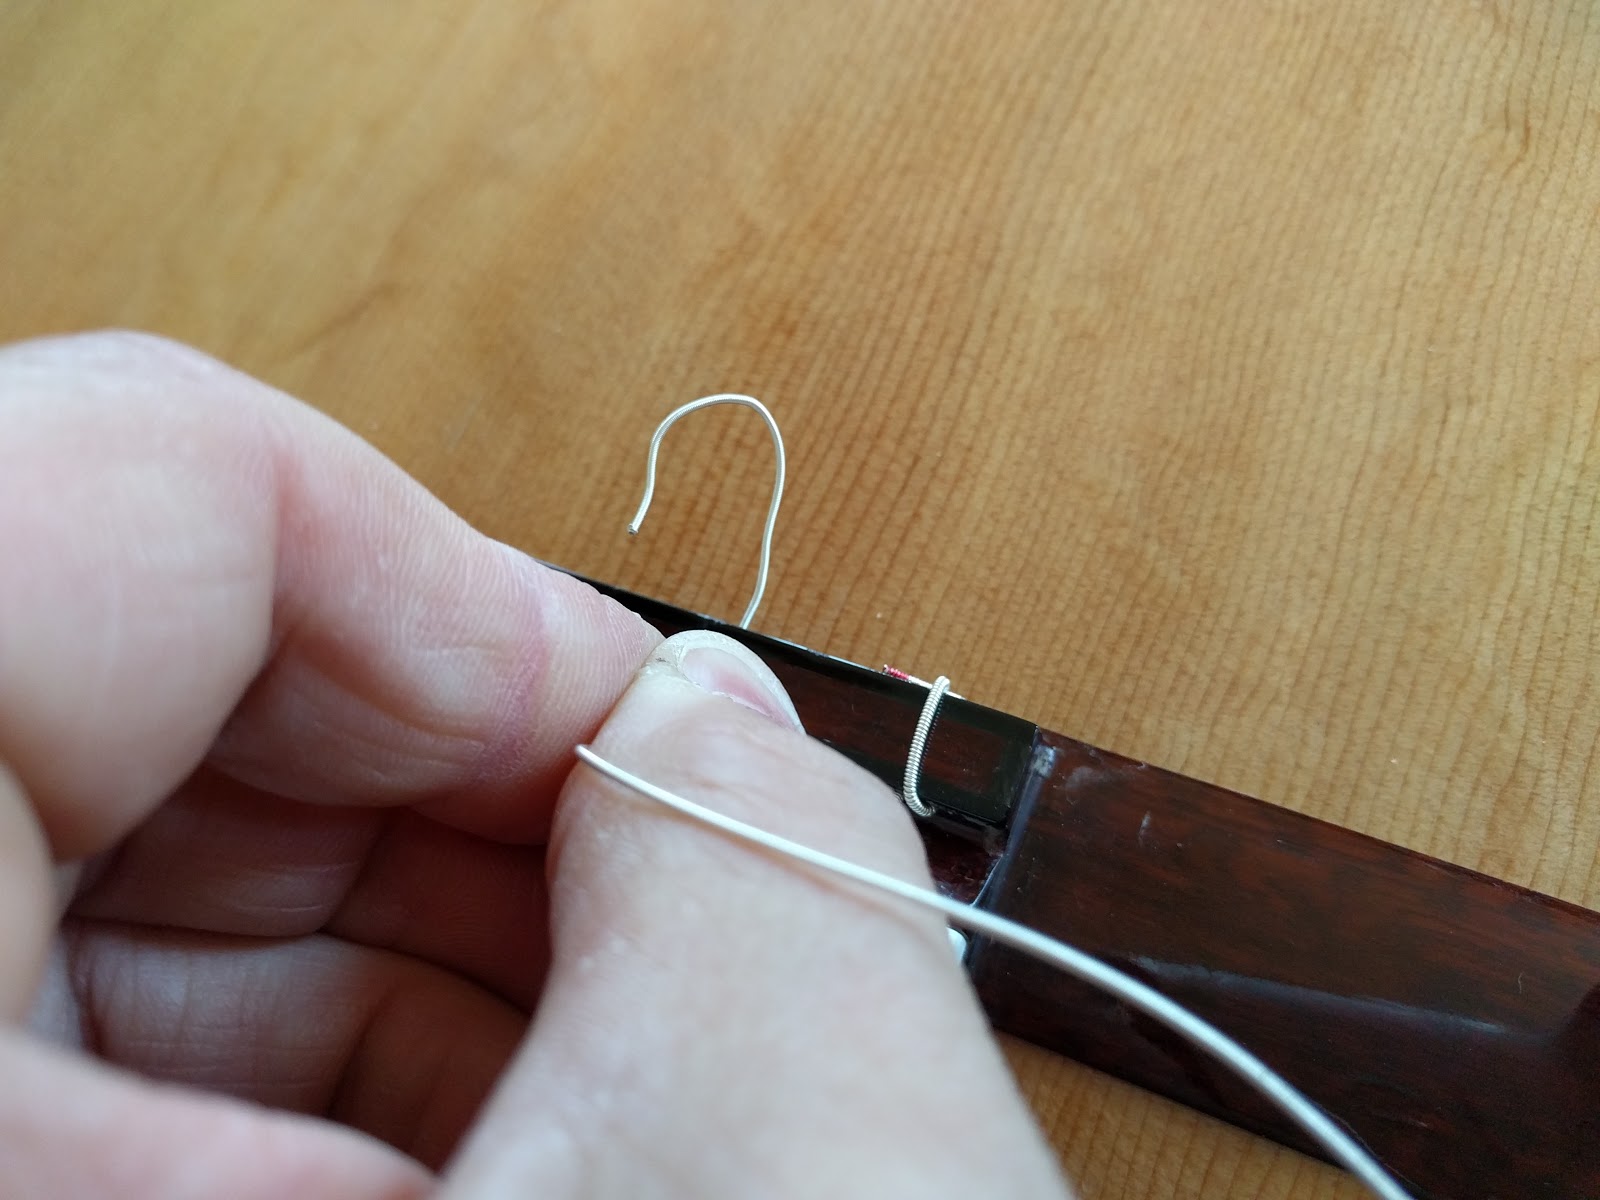
Step 2 – Bury the string end.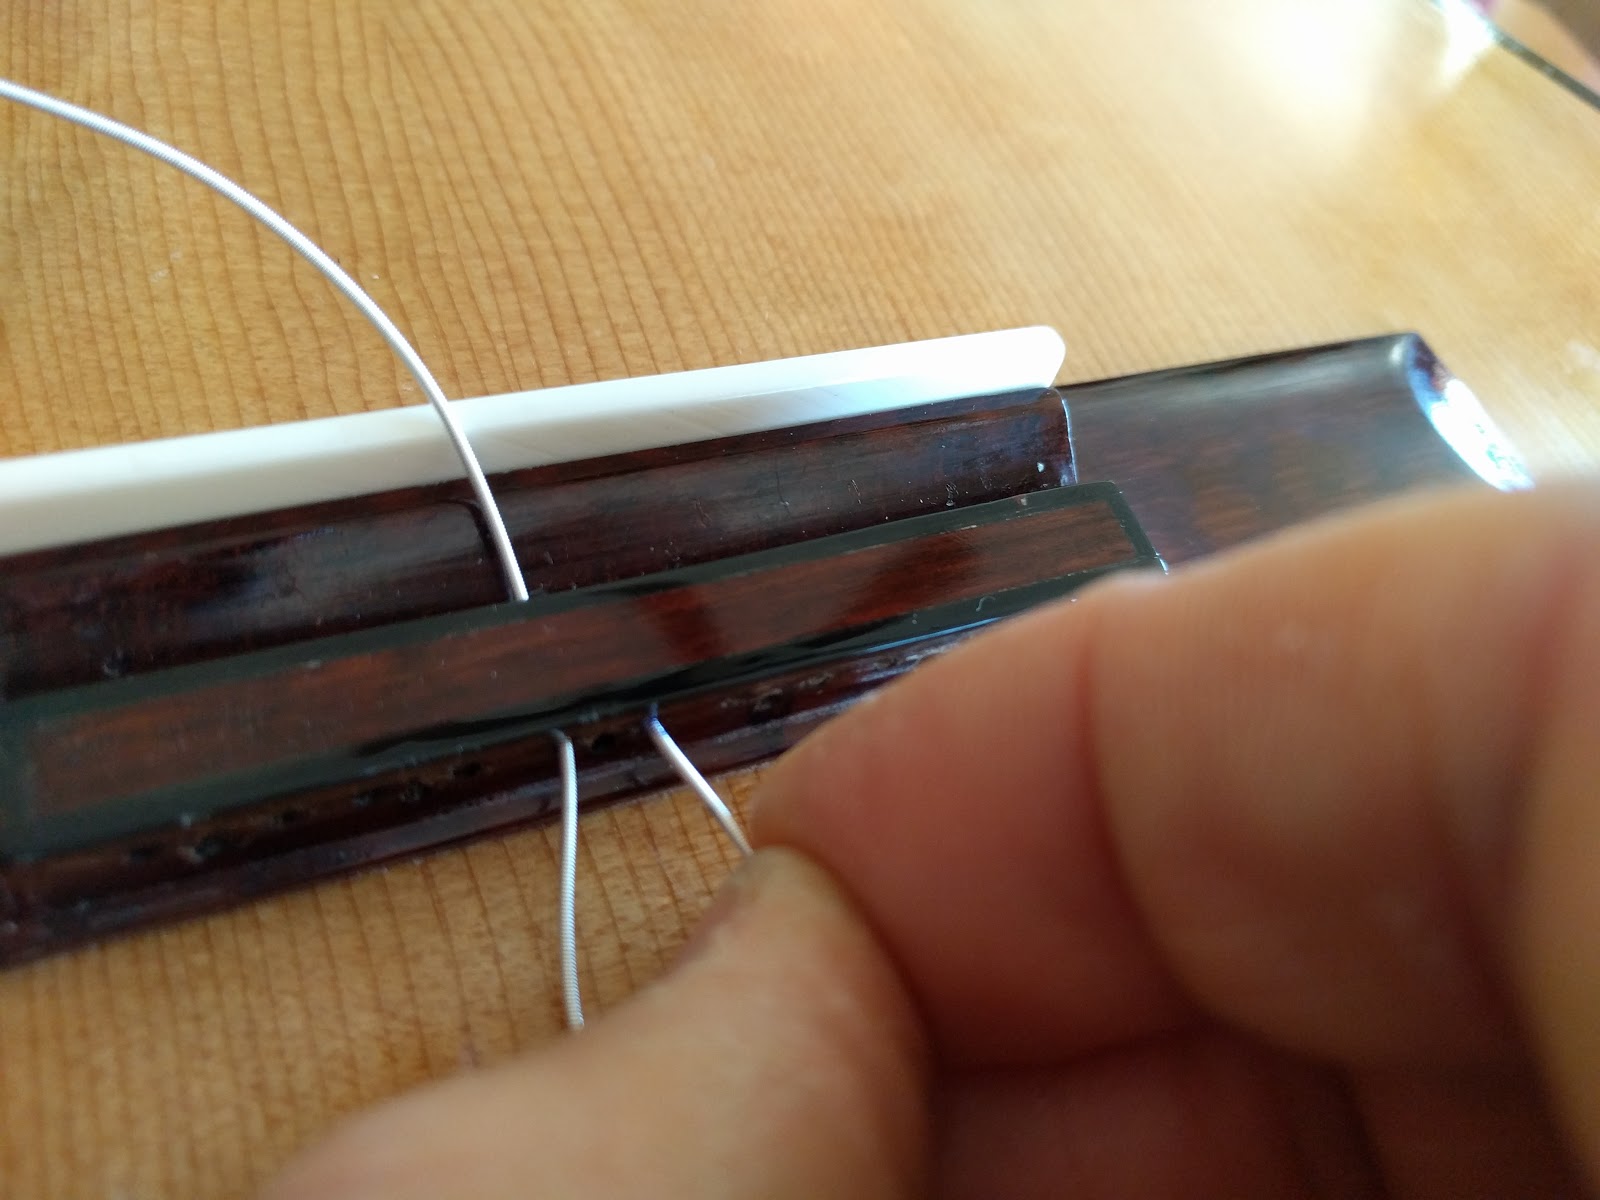
The treble side hole is the “half-hole”. Insert the end of the string into the half-hole until it stops.
Step 3a. Lock the string.
Pull on the string, taking up the slack.
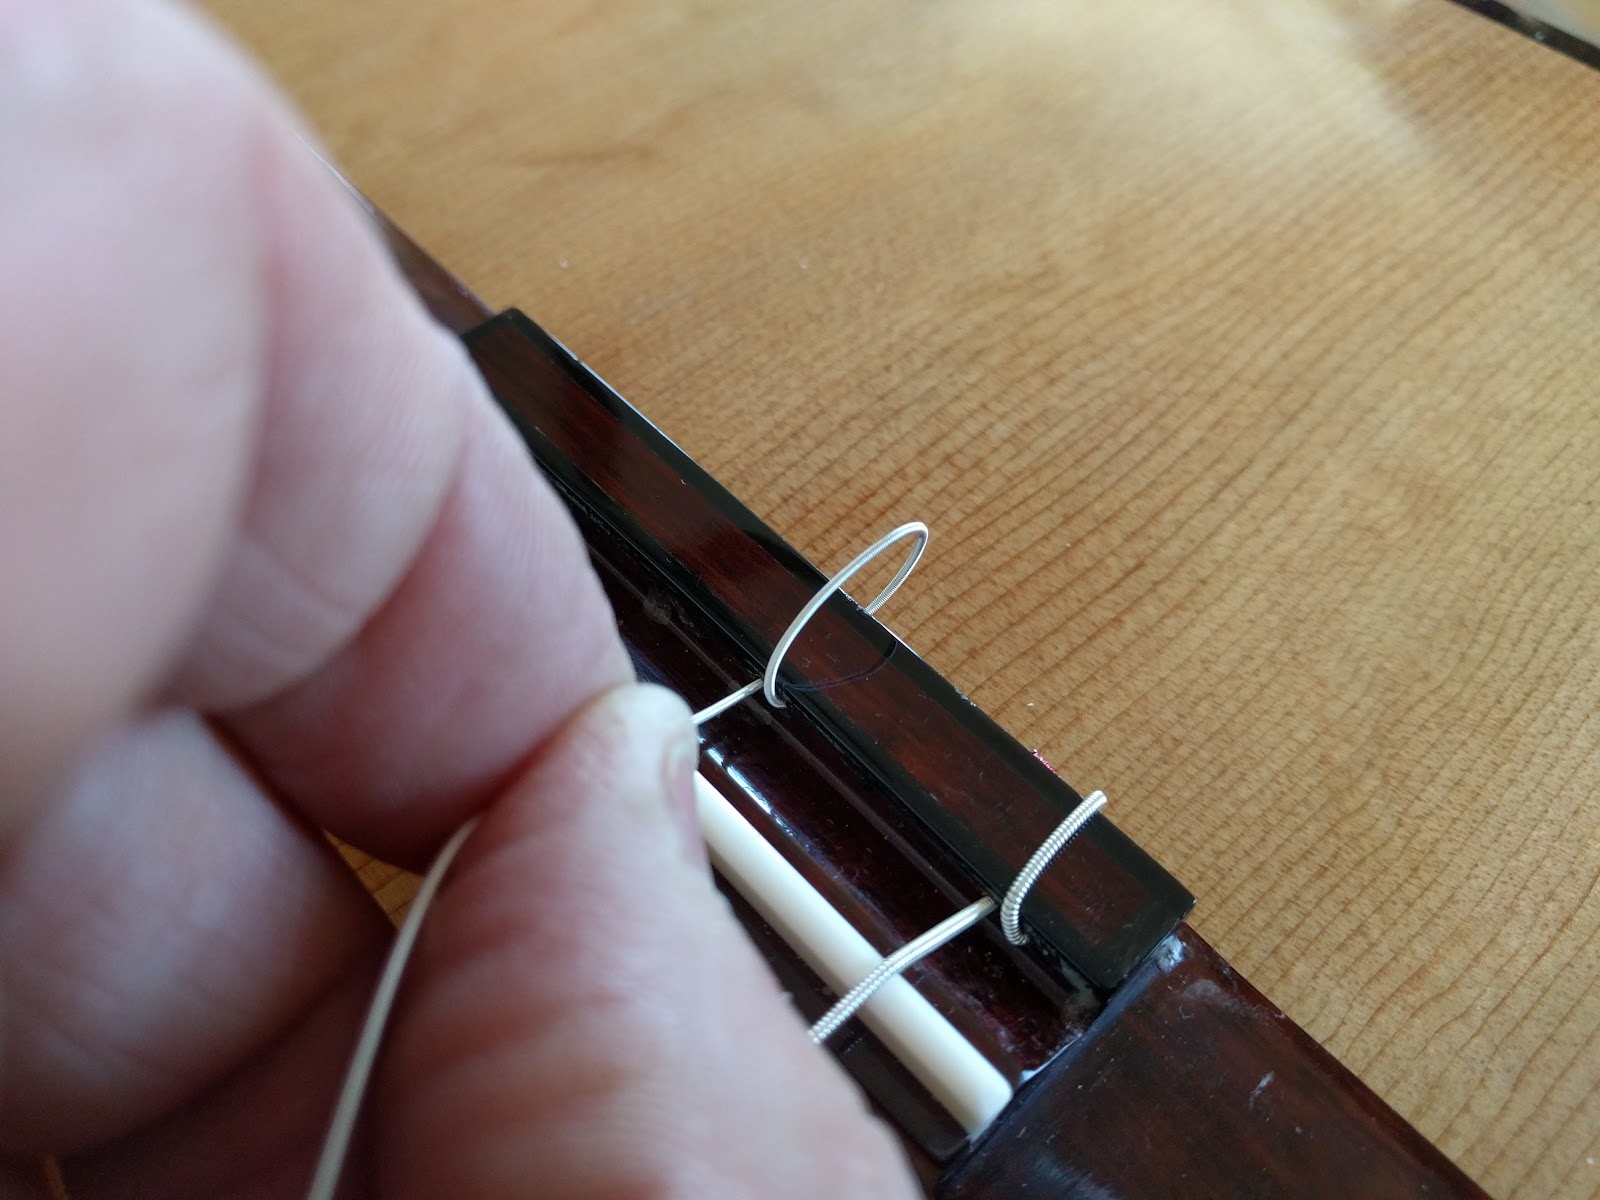
 Step 3b.
Pull until the string is taut along the back of the bridge.
Step 4a – Wrap the string.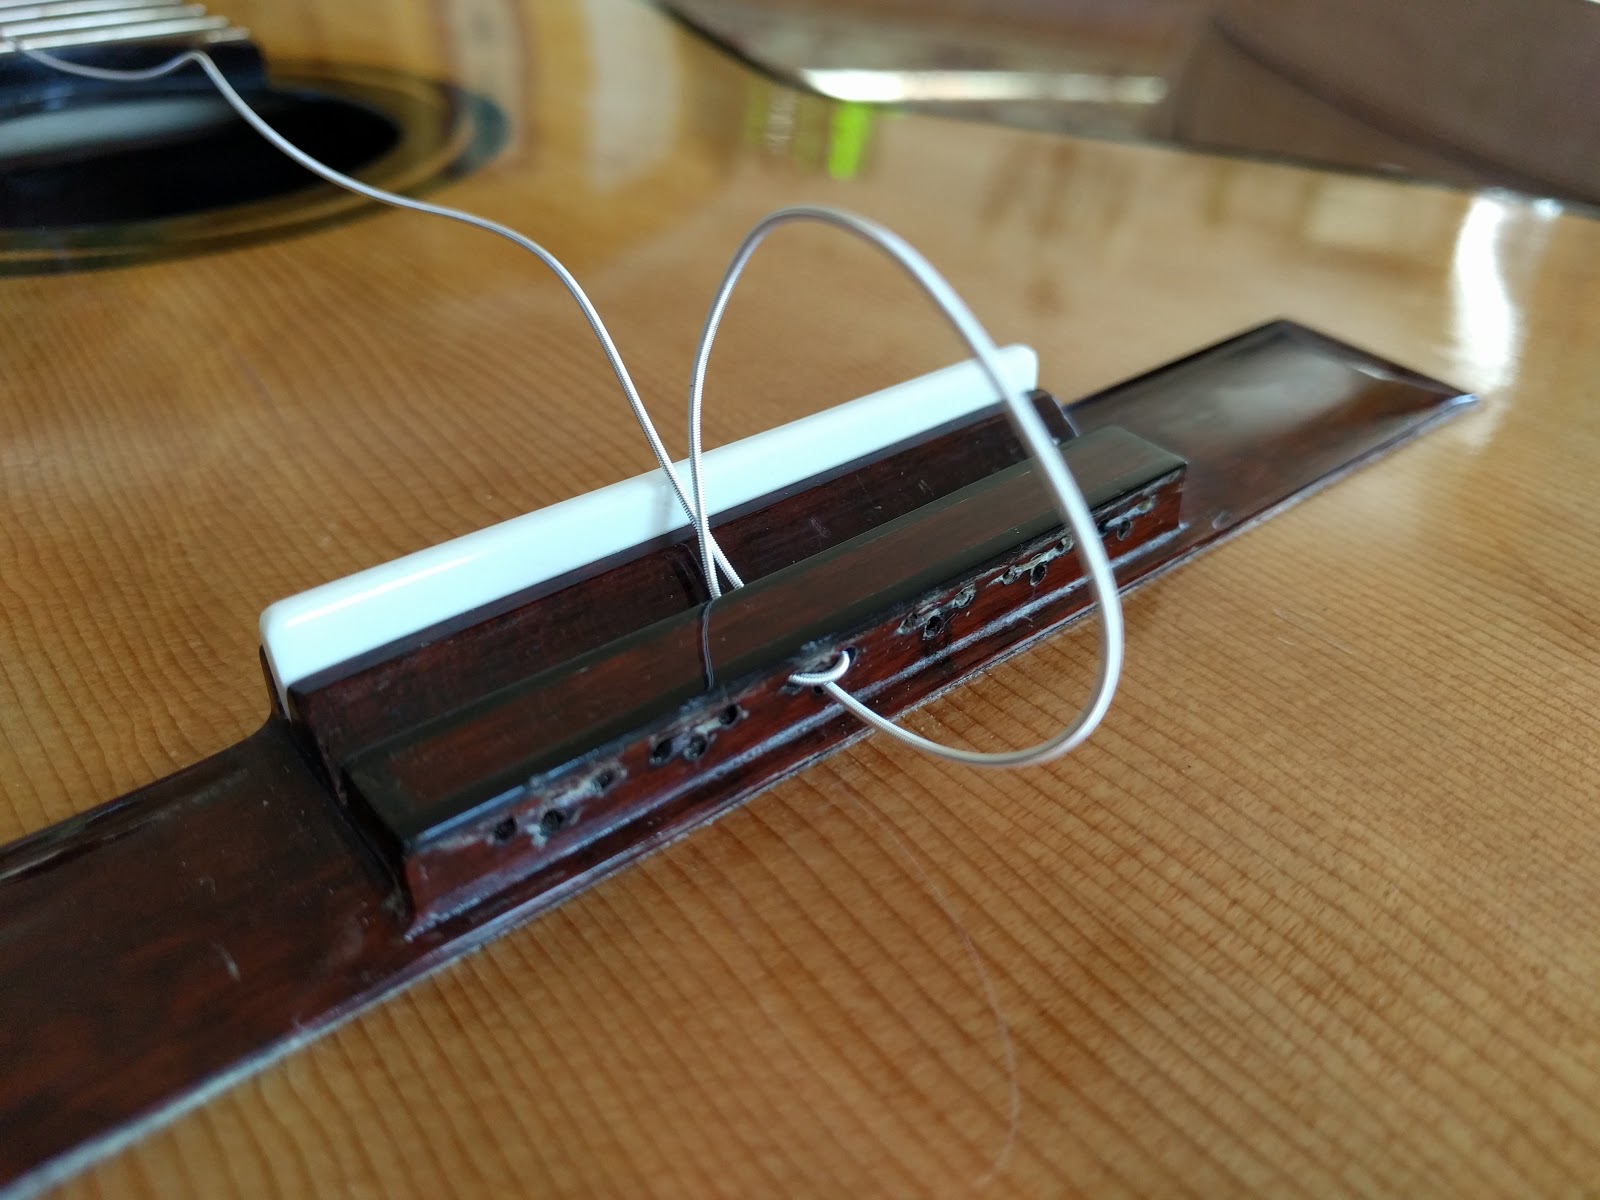
Take the other end of the string and insert it from the back into the lower hole.
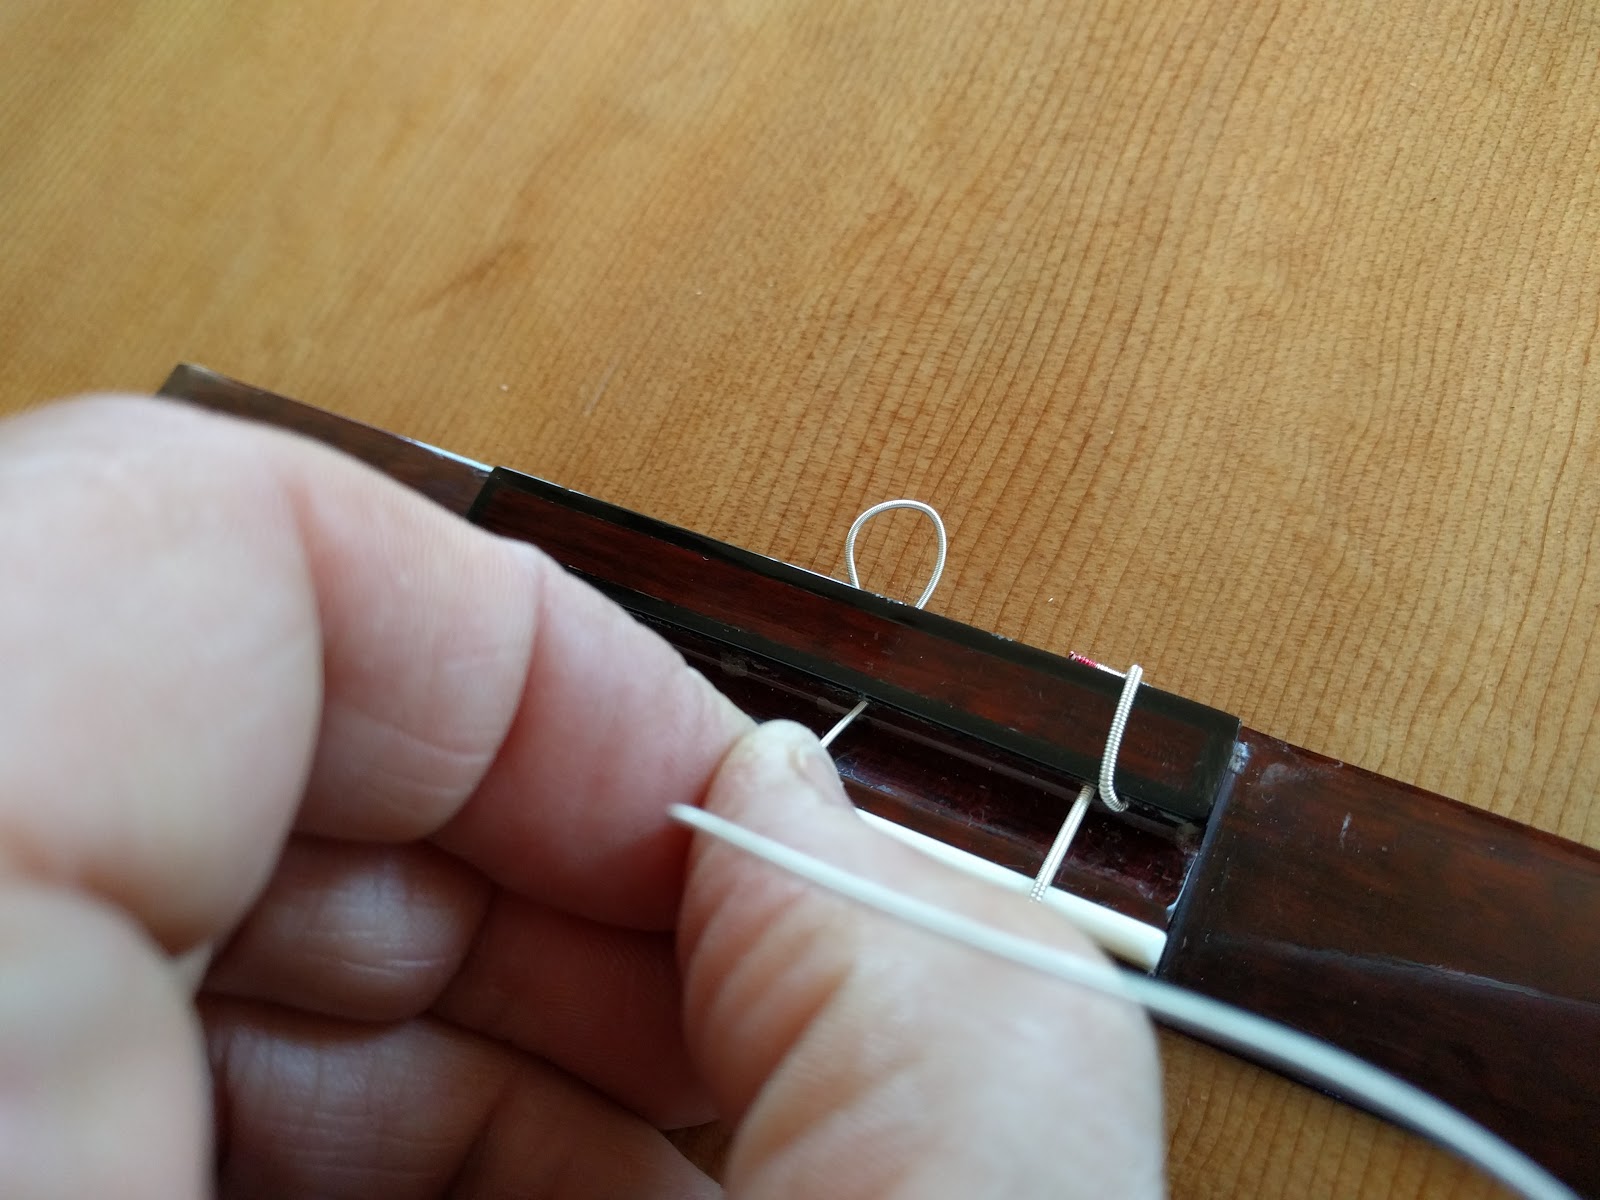
Step 4b.
Pull the string through so it creates a loop over the tie block.
Step 4c.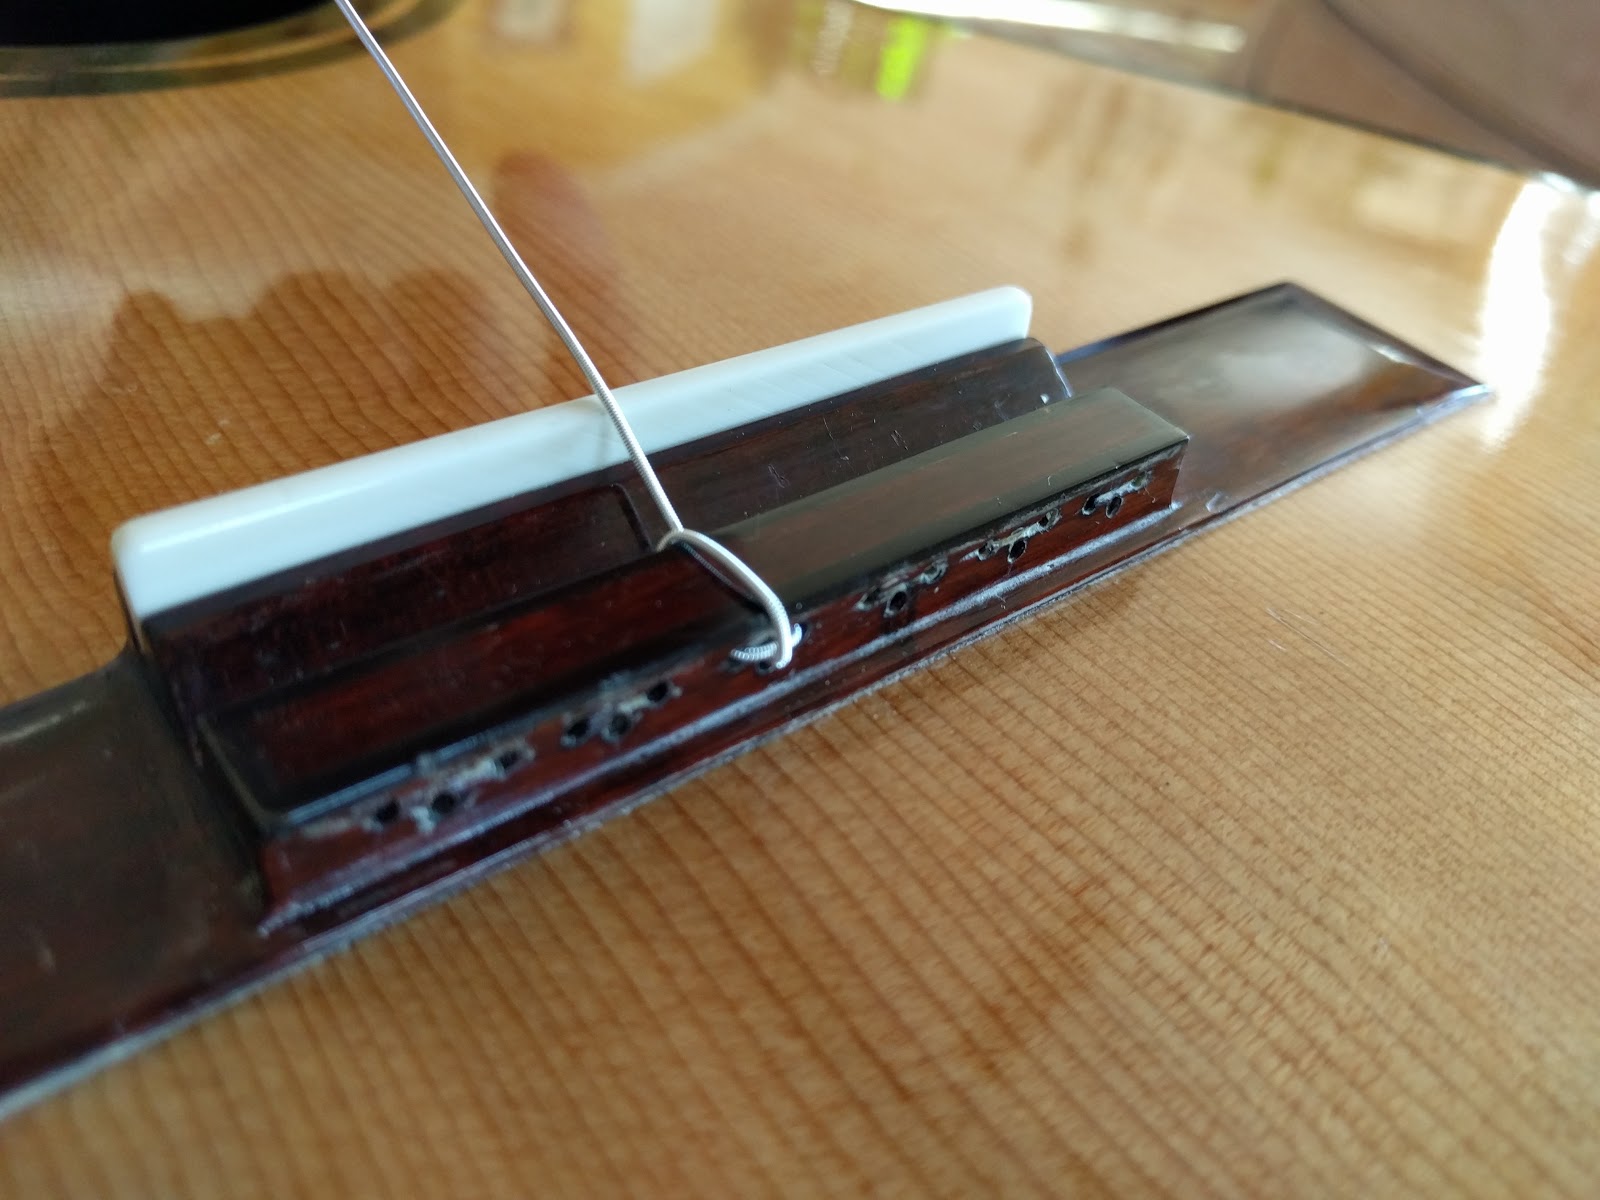
Finish pulling the string until it is taut over the tie block. Notice two things – first how the wrap locks the string into place at the back by vertically crossing the string. Secondly note how low the string exits the front of the tie block, providing more than adequate break angle over the saddle. From here, you simply string the other end up at the tuning machine.
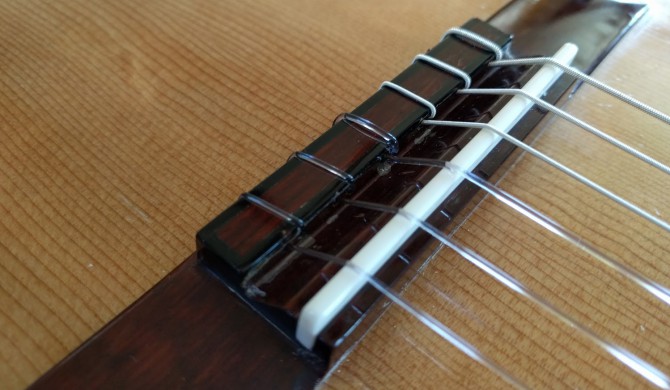
Complete. 
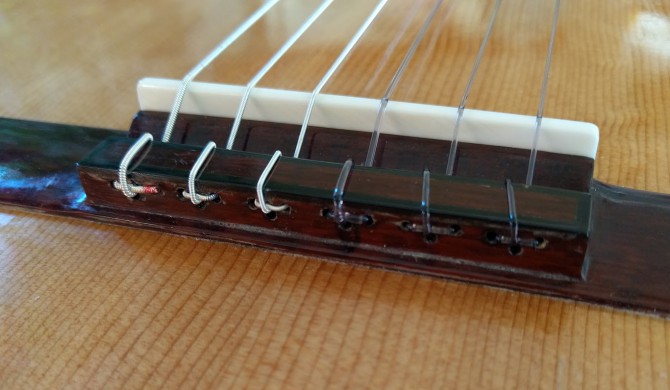
When all six strings are wrapped, the bridge has a clean look, with a single string over the tie block and no string ends exposed in the back.
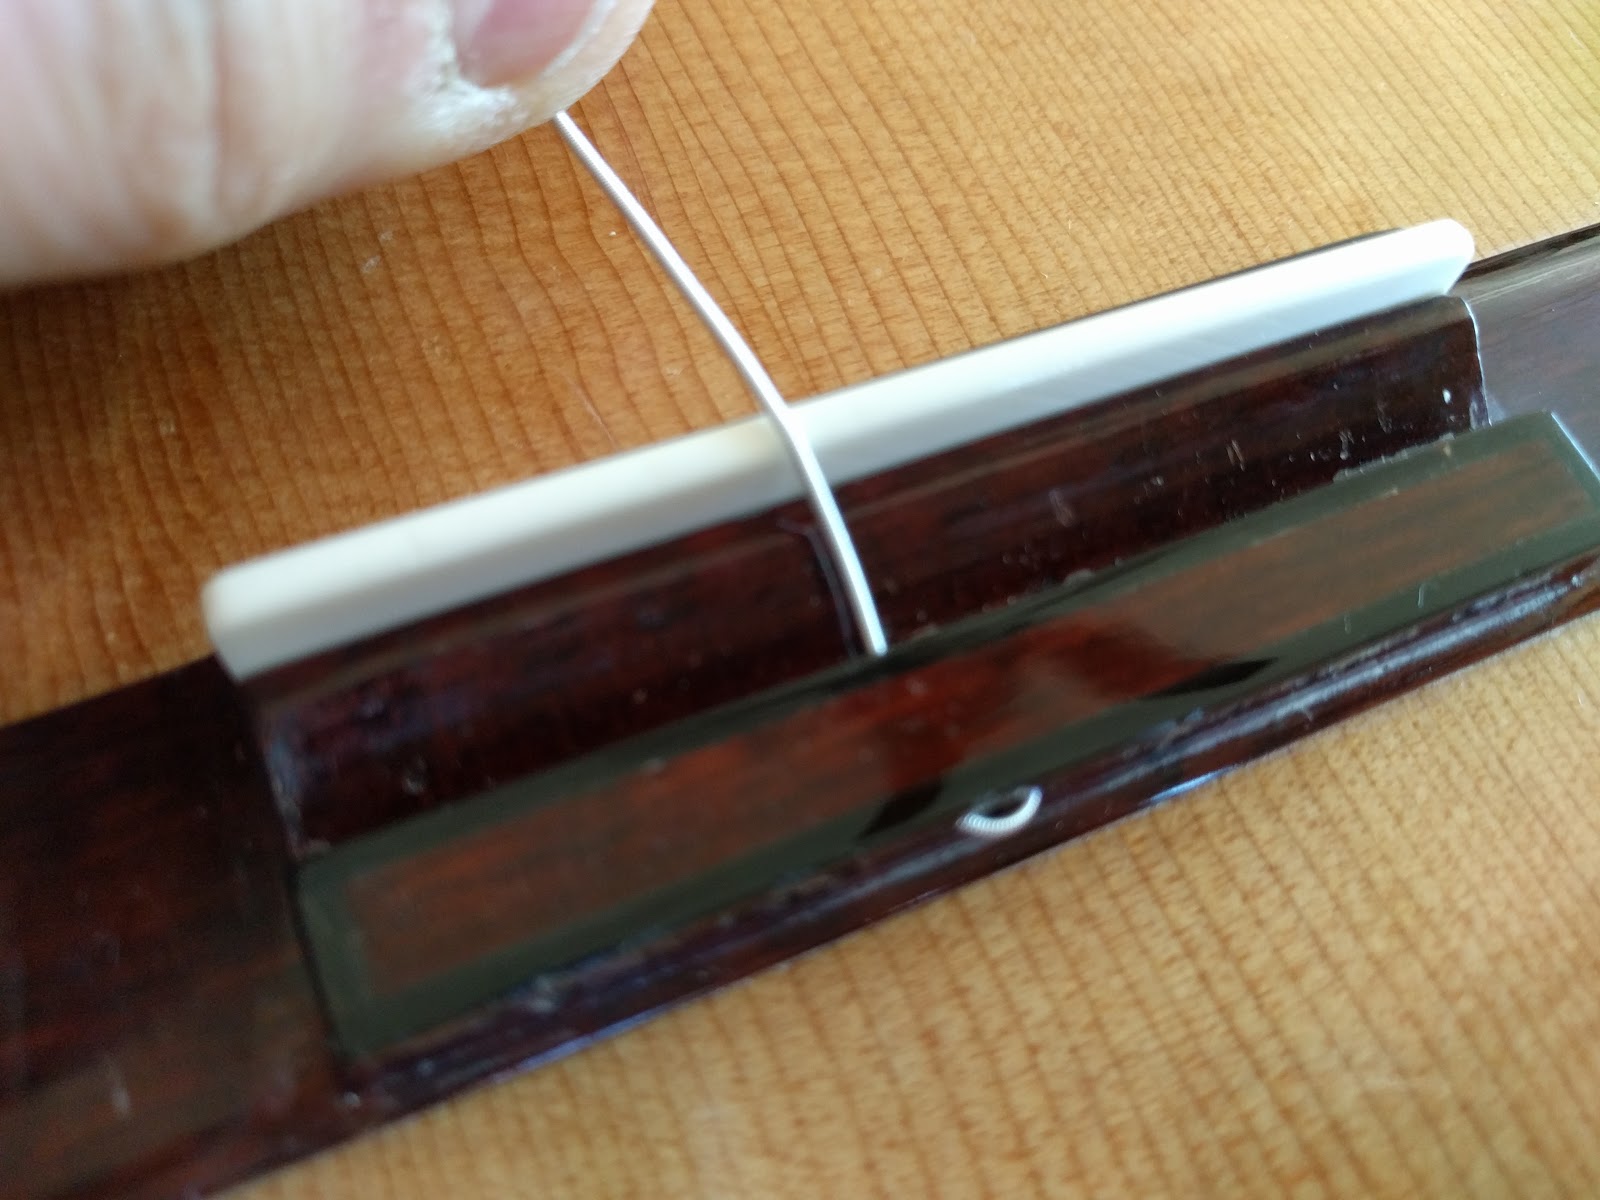
Very simple, foolproof, and keeps your top safe from string slap. But with that said, how does one remove the string? Simply grab the string from the saddle side and push toward the back until it is all the way through (first photo). The string unloops from the tie block. Once again press the string from the saddle toward the back, and the string end will push back (photos 2 & 3). Simply pull the string through and it is removed.
Dec
17
In the world of classical guitars we all learned to string bridges with six holes. Simple – one hole per string, or so it seemed. The various antics to hold each string in place, especially those slippery trebles, is often an exercise in classical guitar gymnastics, especially while trying to turn the corresponding tuner with the left hand, the guitar precariously balanced on the lap while the right index fingernail holds the loop of a treble spring on the bridge.
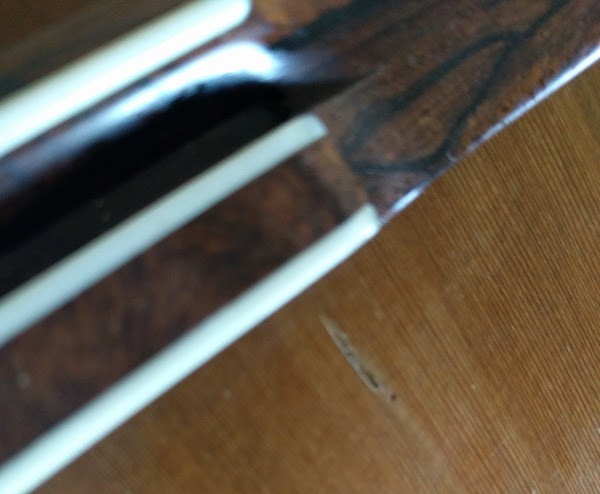
String slap damage behind the treble E string
Aside the antics, there are two issues stringing a traditional 6-hole classical guitar – the first is trying to keep the treble strings steady while tensioning, that is, unless one performs a wrap knot, which I don’t particularly care for. The second is having a treble string that comes loose at the tie block, whips around, its tip slapping the soundboard behind the bridge and gashing the top.
Got a lighter? Good, since one technique involves swelling the bridge-side string end of those pesky trebles with a flame. For the 6-hole, swelling the treble string tips with a lighter is my preferred approach. But seriously, though, there has to be a better way. And there is – the 18-hole tie block.
A Better Tie Block – The 18-Hole Bridge
For each string, three holes are drilled into the tie block. Two of those holes go all the way through the tie block, while the third rightmost hole is drilled from the rear and stops halfway into the tie block. This “half hole” is where the string end is ultimately placed. Let’s take a look at some of the benefits:
- String ends are cleanly concealed in the tie block, in the 3rd half hole.
- Since the string end is trapped in the tie block, it cannot come loose. This prevents top damage that can occur from the dreaded string slap, as shown in the photo above.
-
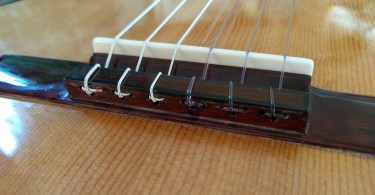
The 18-hole bridge completely strung. Note how string ends are buried in the tie block.
Stringing the guitar is actually far more simple than a 6-hole bridge. Once the tie block is strung one can simply lead the string to the tuner and tension, without the gymnastics of holding the string in place at the bridge.
- If you wish to string the guitar as a 12-hole tie block, that can be done.
- With a 12-hole or 18-hole tie block, the break angle increases over a 6-hole – that is, the downward angle of the string from the saddle to the hole is significantly increased. This can be good for sound, and also helpful if neck angle changes over time have caused the saddle to be filed down. This prolongs the need for “slipping the heel” on a spanish neck guitar or doing a neck reset on a more modern neck construction.

In the next article, we’ll walk through a step-by-step stringing of an 18-hole bridge. Hopefully the above information gives some food for thought for converting a 6-hole to an 18-hole, or ordering your new classical with an 18-hole bridge.