Dec
17
In the world of classical guitars we all learned to string bridges with six holes. Simple – one hole per string, or so it seemed. The various antics to hold each string in place, especially those slippery trebles, is often an exercise in classical guitar gymnastics, especially while trying to turn the corresponding tuner with the left hand, the guitar precariously balanced on the lap while the right index fingernail holds the loop of a treble spring on the bridge.
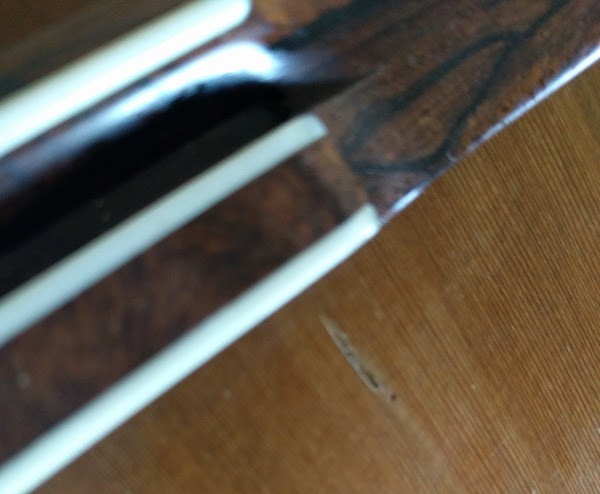
String slap damage behind the treble E string
Aside the antics, there are two issues stringing a traditional 6-hole classical guitar – the first is trying to keep the treble strings steady while tensioning, that is, unless one performs a wrap knot, which I don’t particularly care for. The second is having a treble string that comes loose at the tie block, whips around, its tip slapping the soundboard behind the bridge and gashing the top.
Got a lighter? Good, since one technique involves swelling the bridge-side string end of those pesky trebles with a flame. For the 6-hole, swelling the treble string tips with a lighter is my preferred approach. But seriously, though, there has to be a better way. And there is – the 18-hole tie block.
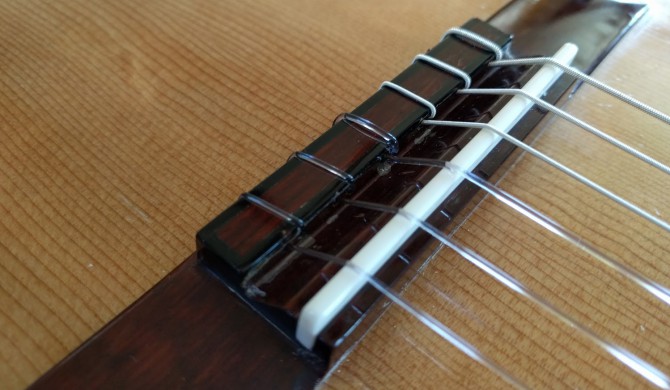
A Better Tie Block – The 18-Hole Bridge
For each string, three holes are drilled into the tie block. Two of those holes go all the way through the tie block, while the third rightmost hole is drilled from the rear and stops halfway into the tie block. This “half hole” is where the string end is ultimately placed. Let’s take a look at some of the benefits:
- String ends are cleanly concealed in the tie block, in the 3rd half hole.
- Since the string end is trapped in the tie block, it cannot come loose. This prevents top damage that can occur from the dreaded string slap, as shown in the photo above.
-
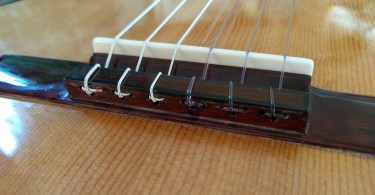
The 18-hole bridge completely strung. Note how string ends are buried in the tie block.
Stringing the guitar is actually far more simple than a 6-hole bridge. Once the tie block is strung one can simply lead the string to the tuner and tension, without the gymnastics of holding the string in place at the bridge.
- If you wish to string the guitar as a 12-hole tie block, that can be done.
- With a 12-hole or 18-hole tie block, the break angle increases over a 6-hole – that is, the downward angle of the string from the saddle to the hole is significantly increased. This can be good for sound, and also helpful if neck angle changes over time have caused the saddle to be filed down. This prolongs the need for “slipping the heel” on a spanish neck guitar or doing a neck reset on a more modern neck construction.

In the next article, we’ll walk through a step-by-step stringing of an 18-hole bridge. Hopefully the above information gives some food for thought for converting a 6-hole to an 18-hole, or ordering your new classical with an 18-hole bridge.

Jan
24
Once in a while we have the opportunity to witness a tragedy turn a new leaf, or a wrong made a right. Even better, sometimes we are blessed with the opportunity to participate in the blessing.
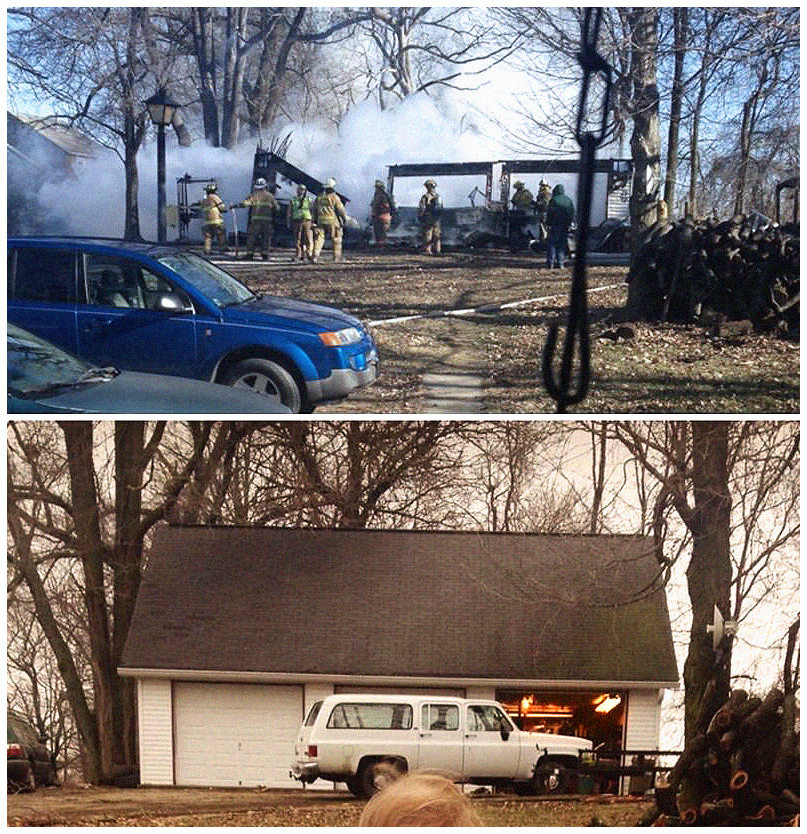
Peters Instruments Burns Down
Well what happened as a tragedy on New Years Eve has now become a groundswell by the luthier and guitarist community to help Shad rebuild. Folks from all walks of life are pitching in and with a bit of perseverance and faith, Shad will be back on his feet and creating beautiful instruments again for his clients in 2015.
I don’t personally know Shad, at least face-to-face. But we participated on a luthier forum together for a few years. I knew Shad as a curious, industrious and always kind individual. It an Internet of faceless names, his kindness struck me, enough so that I welcomed the chance to help in whatever little way I could. And it seems that Shad has touched others in the same way.
Here’s how you can help:
You can keep track of updates at Peters Instrument Facebook page.
Financial donations can be made at GoFundMe.
If donating tools or supplies, I have set up a Google Sheet.
May God bless you, Shad!
Filippo
Jul
22
[The previous articles can be found here: The retrospec – Introduction, Part 1 :: The retrospec – The Core Design, Part 2]
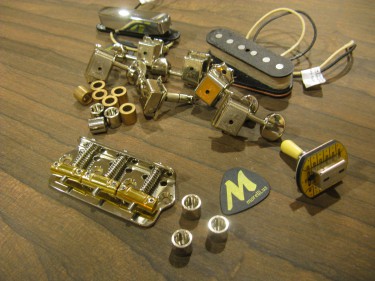
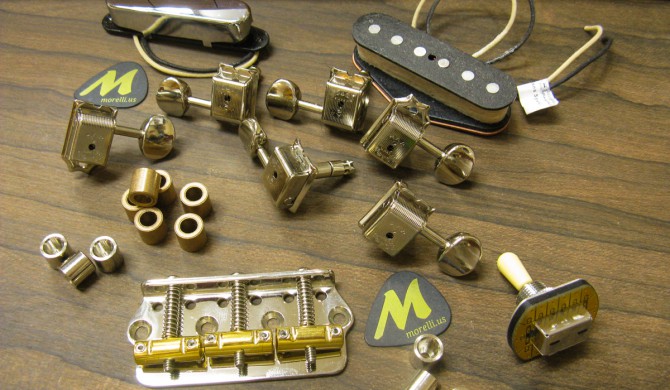
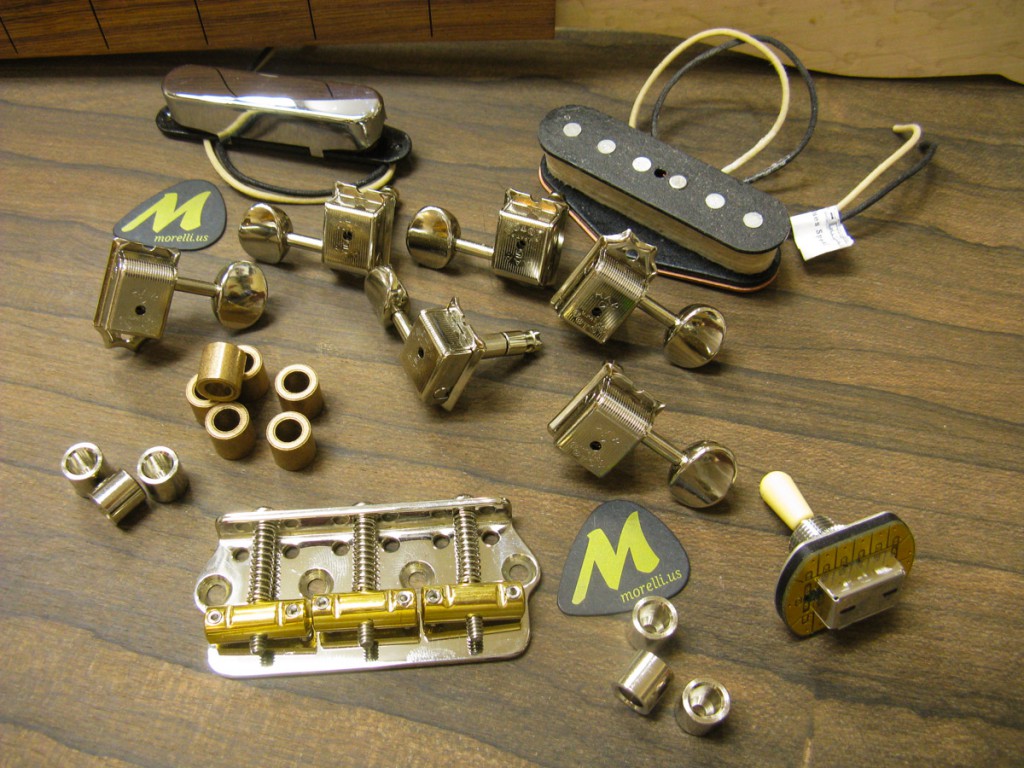
Sorting out the parts for the retrospec
Unlike a classical or steel string acoustic, electric guitars are chock full of electronic goodies and accessories. My uncle once told me that the more controls on an amplifier the less the chance you’ll ever find the sound you are looking for. I must say I’ve come to realize the wisdom in his comment.
But with that said, the retrospecss is an electric guitar so choices we must make. Thankfully this is one of several places where my co-conspirator, Saleh Sabat, is a whirling dervish of gear. So into the deep end of the pool!
From Tuners to Bridge
Let’s start at the headstock and work to the body. Telecasters, for the most part, have always had string trees. We opted to go with staggered Gotoh tuners, requiring no string trees. Tuners will be mounted without top nuts, but rather with the shafts sleeved and free floating in the headstock.
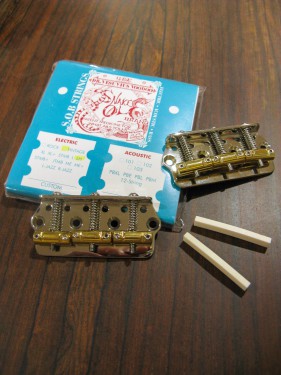
Snake Oil pure Nickel Strings with Buffalo Bone white nut material
From the tuning shafts we mount pure nickel Snake Oil strings. As the strings come to the fretboard, they are supported by a white Buffalo bone nut, which is very hard. This is a small but important detail. The nut slots are polished and facilitate string bending. How so, you ask? We designed the headstock slightly longer than a stock Fender neck, then removed the string trees, ensured the string are a straight line from bridge to tuners.
We then went with the hardest nut material we could polish – all of this to create additional unencumbered string length behind the nut to ease string bending. These are the kinds of details we think about when spending six months designing a guitar!
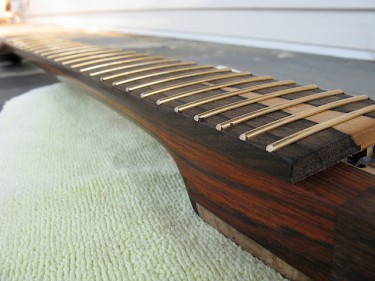
Evo wire on a Ziricote fretboard.
The strings make their way over Evo fret wire, which is a fairly new fret material made by Jescar. Evo wire is harder than regular nickel frets (better bends and better wear) but doesn’t feel different like stainless steel frets. A shiny gold color when new, Evo wire eventually oxidizes to a dull gold color which looks very attractive, both on maple necks and darker fretboards. Underneath the frets is a two way truss rod, which can be adjusted by removing the neck pickup backplate.
Finally at the body end, the strings crest the brass saddles of a Rutters Chopped Bridge. Machined from cold rolled plate steel, it is both elegant and tone enhancing. The strings finally pass through the body and are secured by flush mount chrome ferrules.
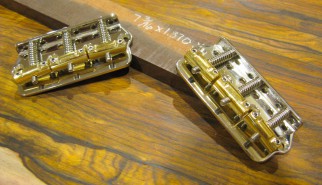
Custom steel bobtail bridge with compensated polished brass saddles
Unlike Fender guitars which mount the neck perfectly horizontal to the body, the retrospecss will have a mild neck back angle. This allows us to project a slightly higher string height over the saddles, which we find better contributes to the guitar’s tone. The added height will add a sixteenth of an inch of saddle height, without requiring a taller neck mount or higher neck pickup setting.
Pickups
The retrospecss is available with four different pickup configurations. The first will be the standard Telecaster bridge/neck pair. The second, a Nashville version which adds a third middle pickup and unique six-way toggle switch. The third configuration will be the minimalist’s guitar – a single bridge pickup. Finally a special Charlie Christian version of
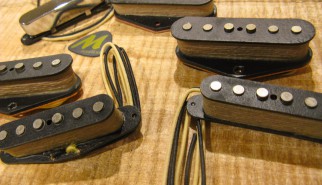
Custom wound pickups, specific to the retrospec
Unlike the Telecaster, our pickups will be rear mounted and rear adjusted. The front body routs will allow the top of the pickup to protrude through the body. The back plates will be made from the same body wood material, yet carrying more wood mass behind the pickup. The pickups will mount to the back plates and their height adjusted from the rear.
Electronics and Control Gear
High quality electronics are important to an accurate and well focused sound. The retrospecss starts with CTS pots with 10% tolerances. The tone pot is no-load, so it can be completely taken out of the circuit (along with the capacitor). Wiring is vintage cloth. The capacitors are oil filled, new old stock from Russia, which are known for great tone. The jack is Electrosocket mated to a Switchcraft jack, which is a far superior solution to the traditional Tele cup. Finally the switch is a 3 way toggle, as one would see on a Gibson, but still maintaining the round Telecaster style switch tip.
Like the pickups, the tone and volume controls will be mounted through the rear. Instead of being surface mounted, the front routs will allow for the knobs to protrude through the top. Controls will be mounted on an inner cavity plate, allowing the knob depth to be adjusted.
Jul
22
[The previous article can be found here: The retrospec – Introduction, Part 1]
I have always been a student of design, fascinated with how people create from their imagination. Having worked across a number of mediums over the years, I’ve enjoyed carrying inspiration from one discipline and applying it to another.
In the case of the retrospecss our goal was to bring forward the essence of the classic Fender® Telecaster®, accentuating its iconic aspects and removing those design elements which detract from the guitar. Obviously such an exercise is one of personal interpretation!

The French Connection – Coddington’s interpretation of the Lincoln Roadster.
The French Connection
I know of few people better at the game of reductionist design than hotrodder, Boyd Coddington. While customizing cars has been an American passion for sixty years, Boyd took the craft to a high artform.
Striving to create a crisp visual representation – accentuating lines, perfecting proportions, and shaving off parts such as door handles – Boyd’s cars always evoke a deep sense of style and beauty. His use of color was often minimal, accentuating the overall form in two colors or using one to allow the underlying shape to speak for itself.
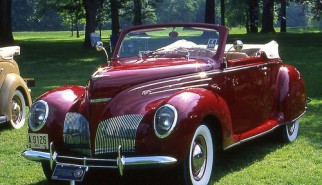
1939 Lincoln Zephyr, as original as they came.
When we began working on our modern interpretation of the Telecaster, I immediately thought back 20 years to when I read Boyd’s (then new) books. I spent hours studying his designs and settled on Boyd’s last work before he passed away. Named the French Connection, Coddington’s creation was based on the 1939 Lincoln Zephyr as its inspiration.
Much like the Tele, the Lincoln Zephyr was a beautiful design, yet contained several stodgy elements. With smooth flowing lines, the Zephyr is nonetheless upright with broad step up rocker panels, an abrupt snout and period whitewall tires which detract from the essence of its shape. The bumpers and mirrors, while functional, are details which detract from the flowing shape.
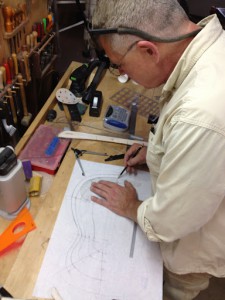
Shaping the Body
Jumping right into the retrospecss there are a few basic elements that I wanted to address – the horn on the Tele looks bulbous – almost as if someone designed the cutaway with a hole saw. I reshaped the lower horn, creating a more gentle transition. Furthermore the shape of the body above and below the fretboard was re-curved to increase fretboard access while also creating a better visual line.
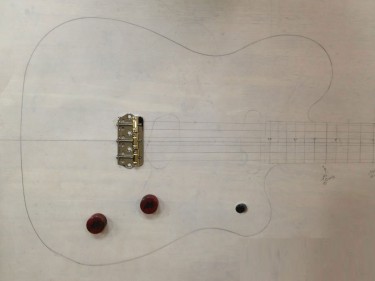
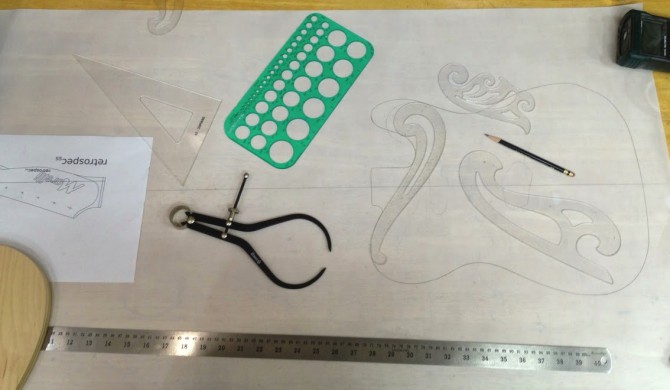
retrospecss body outline with mock hardware.
A few design elements are not evident in the drawing. The top of the body will be slightly carved with recurve, just enough to reflect light at different angles. The back of the body will have a tummy cut like the Stratocaster®.
Unlike the Tele, the body to neck transition will not be square but rather transition as a smooth curve. As a result the necks will not have a bolt-on plate but rather a 3 bolt system, freeing up the treble side of the body to be carved to meet the neck.
Finally several details on the body face depart from the classic Telecaster. Gone is the bulky “ashtray” bridge, replaced with a an elegant bobtail bridge. The chrome control plate is removed, the tone and volume staggered to follow the body line, and a 3 way toggle switch (with Tele switch tip) centered in the lower horn. Finally the bulky pickguard is removed and the pickups are rear mounted, with front routs just large enough for the pickup bodies to protrude.
The Headstock
Headstock designs always have a strong visual correlation to guitar makers. Fender electric headstocks, for example, mount tuners on one side and tend to have a similar (but varying) curvature on the treble side. There are many mediocre headstock designs (after all beauty is in the eye of the beholder). Designing an elegant headstock can be no small feat.
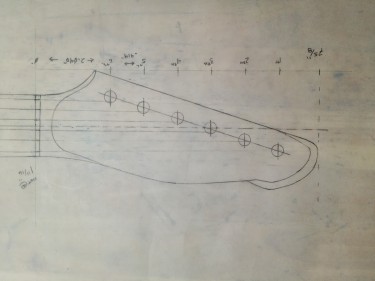
Headstock design maintains inline tuners with Starcaster flair.
The retrospecss headstock creates both a more elegant treble side shape and more consistent proportion from end to end. The headstock is also slightly longer and introduces a relieved tip that is reminiscent of the Starcaster. Finally a more unique transition from the fretboard to the headstock brings a more elegant transition versus Fender headstocks which have a simple swoop designed to be shaped on a cylindrical sander.
The next article will discuss the hardware choices and how they are mounted to the body. There are some unique design decisions which we’re excited to see come to life!

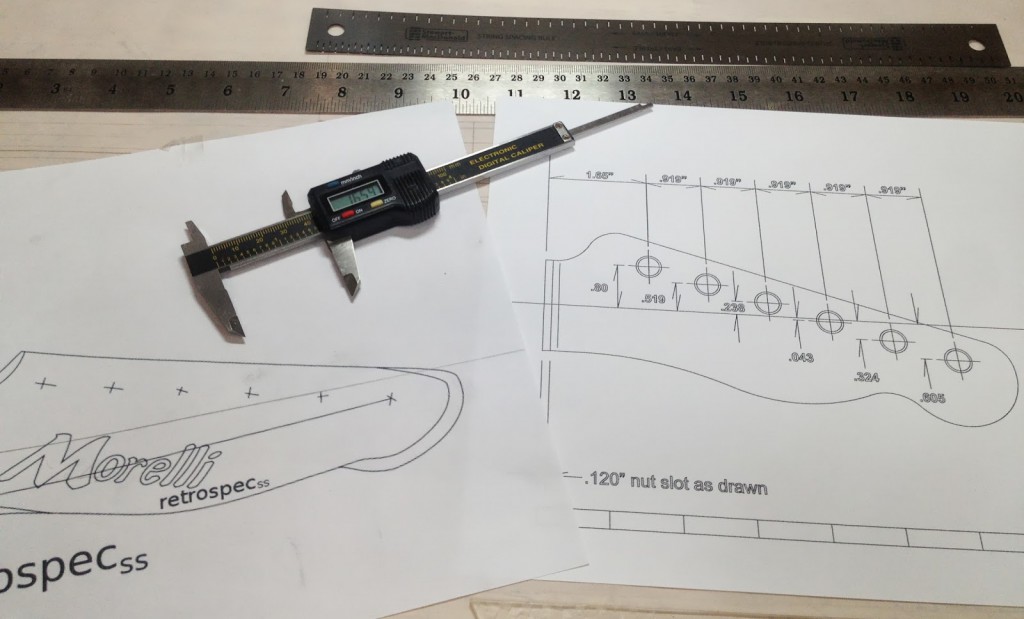
Drafting templates. Vellum. Digital calipers.
Jul
22
At the beginning of the year a number of Fender® Telecasters® came through the shop for various repairs. Their unique sound and affordable price have made them popular for over half a century. Consequently there are no lack of Teles® in need of setups, refrets or upgrades. I’ve always enjoyed the Telecaster’s unique sound and iconic design. In fact the Telecaster has become so iconic that Fender’s attempt to receive trademark protection of its shape was denied in 2009 by the U.S. Trademark Trial and Appeals board.
Leo Fender designed these guitars to be built with cheaply available materials, a simplistic shape and rudimentary assembly techniques that could be executed by unskilled labor. The ease of construction is clearly seen in 1950's footage of the Fender factory . While a fan of the Telecaster, I wondered how might a Telecaster look and play if designed today for skilled production?
As I began to conjure alternate designs, my good friend and superb musician Saleh Sabat began waxing poetic about the Tele. You see he’s a big fan of Leo’s creation and has even assembled his own mongrel Tele courtesy of Warmoth and a half dozen other boutique manufacturers. Be it the chicken pickin’ twang or good looks of a worn out Telecaster, Saleh had a lot to say about what made good ones sing. It became obvious we had much to do.
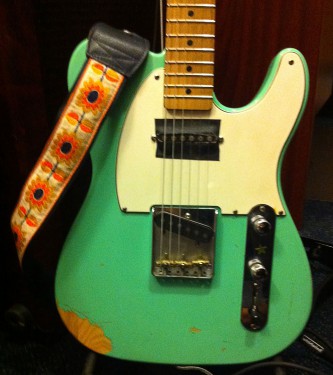
Saleh Sabat’s “Chewie” – a starting point.
At the beginning of 2013 we began what became a six month journey to design a new guitar – one inspired by several Fender icons – primarily the Telecaster, along with the Stratocaster®, Starcaster® and Jaguar®.
The nascent guitar’s new name, the retrospecss, seemed fitting – the subscript representing Saleh’s initials.
Our goal became clear – to design an elegant and sometimes ingenious guitar that retained the essence of the icon, in sound and design cues, yet embodied a completely new and modern interpretation.
The culmination of ideas has been codified on vellum with french curves under the lead of a Mirado Black Warrior, in design spec documents, and a stream of SMS and Facebook message long enough to write a small novel. A relentless pursuit with many epiphanies, we have strived to leave no detail unturned. Along the way I constructed a standard Telecaster to gain a more intimate understanding of the instrument. We’ve now acquired the woods and the hardware; it’s time to build templates, jigs and develop the construction processes. Over the next six months we’ll be creating four retrospecss guitars. We hope they do their iconic inspiration justice.
We just may have a few great ideas up our sleeves and we’re looking forward to sharing them with you! Keep an eye out on our blog as we begin realizing the retrospecss from our imaginations to wood, metal and electricity.
Comparing the retrospec headstock design to the Telecaster.
Jul
22
Made from Spruce fibers formed in a vacuum composite, the Flax is a rather unique hollowbody electric. A new process invented in Finland, Spruce is shredded along fiber length then mixed with a resin to form the body. A colleague of mine had a connection which led to our receiving two bodies and necks. This is the first guitar built in the USA from this process, to my knowledge. How did it work out? Well it sold quickly to the first customer that played the instrument.
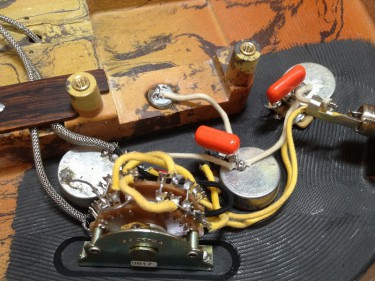
Vintage cloth connects CTS pots and a Superswitch. Orange Sprague capacitors.
I had Lindy Fralin wind the single coils. The wiring is super slick – a 5 way 4 wafer superswitch and some modifications to the single coil wiring allows for parallel, series and series out of phase configurations. The black finish is a special electrical insulating paint which I use at the controls and in the pickup cavity to reduce noise in the circuit.
The tone pots are no load which allows the player to take the tone pot (and capacitor) completely out of the circuit. Quite a bit of versatility with minimal controls.
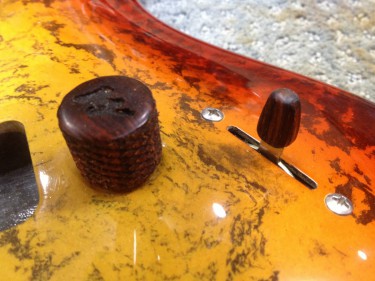
Knurled Cocobolo Rosewood Control knobs and switch tip.
Typically Morelli electrics have the M signature logo in the headstock. Given the flying eagle landing on the truss rod, I moved the logos to the control knobs. The knurled surface provides a very positive feel, and very unusual detail on electric guitars. This is more often found on the grips of high end pistol grips and rifle stocks.
White MOP fly Eagle inlays.
The inlays are individually made feather and body sections, mostly in varying pieces of white Mother of Pearl. The birds are assembled on cardstock, then glued together, finally sanding off the cardstock. It is far easier to inlay one bird rather than its twenty constituent pieces.
Given the unusual black dyed Spruce composite neck (the fretboard is not black Ebony) a few tricks were necessary to get an effective fill during the inlay process. Dust was made from the fretboard material, along with cyanoacrylate. The fretboard was then black dyed again to ensure a uniform finish. As a final detail, the fretboard side markers were finished in a special glow-in-the-dark orange dots – quite visible in dim light onstage.
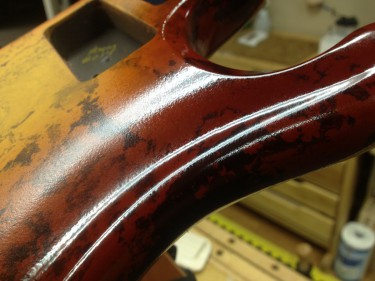
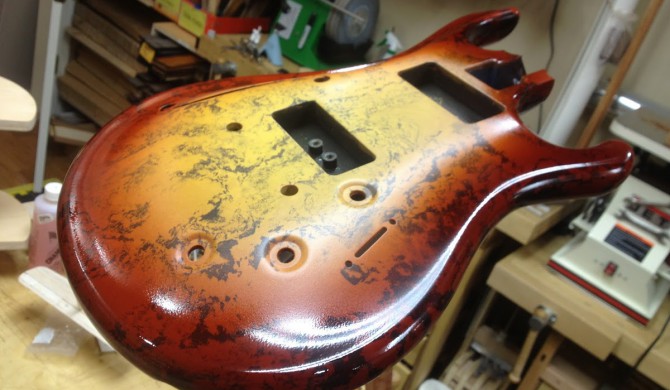
Tobacco Orange Burst in Nitrocellulose Lacquer. Translucent edge shows swirled Spruce.
The sunburst colors were progressively mixed from a single base to create a fluid transition from amber to tobacco orange. The edge was sprayed light enough to allow the black swirls to also show at the darkest parts of the tint. Unlike Flaxwood guitars finished in urethane, this guitar was shot in nitrocellulose lacquer.
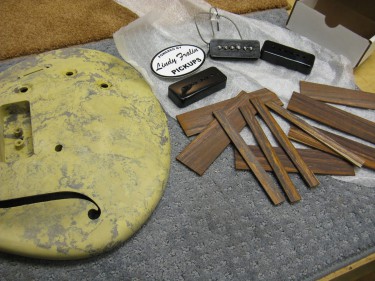
At the beginning of construction, body and Cocobolo Rosewood.
A full fret level and polish was performed to ensure we could dial down the action to where it played like butter. Careful attention was placed to round the fret ends and chamfer the fretboard, ensuring the best possible left hand comfort and playability.
Can we build one for you? Absolutely. To see more picture of the finished guitar, check it out in our Portfolio Page..
Feb
20
Everyone has their pet peeves I suppose. I am not a huge fan of plastic on guitars, be it binding, purfling, electric guitar knobs …. or pickup covers. My guitars are carefully designed, sculpted and finished with just a bit of obsession to details.
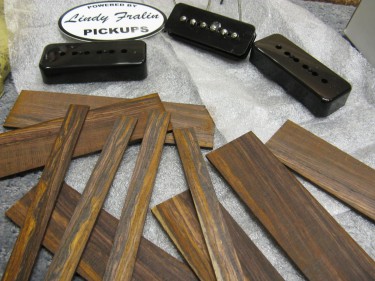
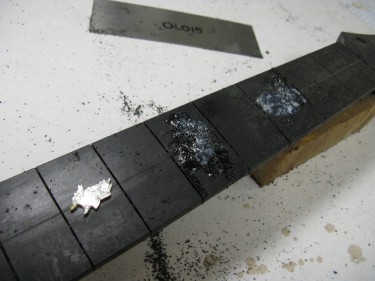
Cocobolo Rosewood cut for pickups
For pickup covers, first I select the wood which compliments the guitar. In this case the instrument is to be finished in a orange sunburst. Cocobolo Rosewood is the obvious choice, with rich orange colors and wonderful dark ink lines. Cocobolo is a fantastic wood – hard, resonant and beautiful. The wood oxidizes over time, darkening to very rich and warm hues. Unfortunately Cocobolo dust is also very dangerous to breath. It is a sensitizer – the more one breathes the more one is likely to incur increasingly allergic reactions. When cutting and sanding, precautions are taken, vacuuming with a HEPA filter and wearing a protective breathing mask.
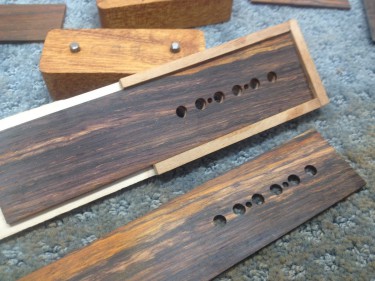
Top cover carrier used to index magnetic pole and screw holes
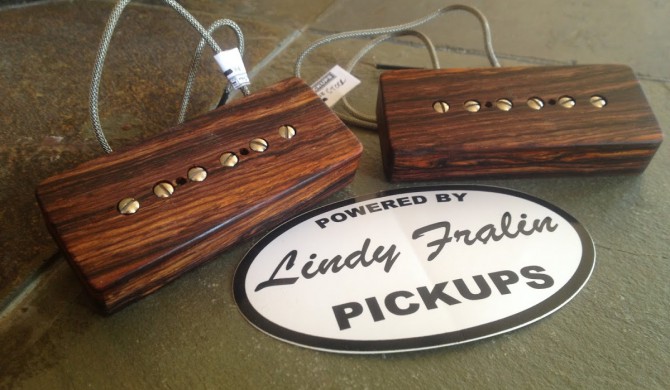
With the holes drilled I finally start assembling the pickup covers. P90 plugs are made from Mahogany and have 3/16″ steel pins to correctly register the pickup cover on center. The sides are tacked in place with cyanoacrylate (super glue). A bit of paste wax keeps the plug from becoming glued to the cover. Once the sides are glued to the cover top, the plugs are removed.
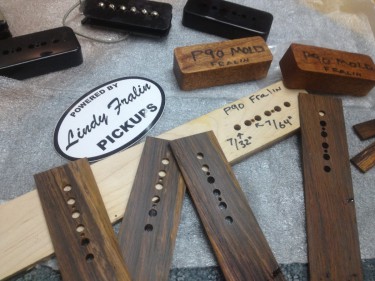
Tooling jigs – plugs and drill index carrier – for drilling and assembling covers
Covers take several hours to create. A small detail, maybe, but such details bring design cohesion to the final instrument. Do the rosewood covers contribute to the tone of the instrument? Of course not – but I’m sure someone will speculate nonetheless!
Jan
31
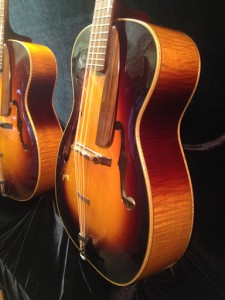 We are excited to announce that we recently won an instrument building competition. Partnering with luthier Todd Stock we set out to build a matching set of Octave Mandolins. Judged by luthiers, this matching set took first place. These instruments were very unique – one third violin, one third mandolin and one third acoustic guitar.
We began building the pair of octave mandolins in August 2012. Inspired by the work of luthier Fletcher Brock, these instrumental twins were made from the same timbers with slight variations in details and finish . Eastern Hard Curly Maple comprised the back, sides, neck and binding. Canadian Spruce was hand carved and tap tuned to produce a very responsive carved archtop. Finally the fretboard, headstock, bridge and suspended pickguard were fashioned from Bolivian Rosewood. The finish is a vintage tobacco sunburst shot in Nitrocellulose Lacquer.
In the hands of a very capable gigging musician, this instrument now resides in Colorado. For details on the final instrument, please view the portfolio.
Jan
12
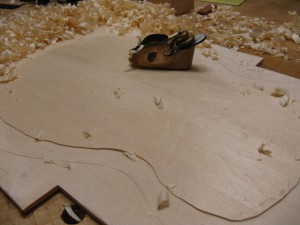
Carving the top with a convex hand plane.
So I broke out the wood stash.
Hauling lumber to Todd’s shop, we resawed a gorgeous stick of Eastern Hard Curly Maple, some fine vertical grain Canadian Spruce and a two foot chunk of Pao Ferro to make up the fretboards, bits and details. The Spruce was a 2×4. Yes you read that correctly, a 2×4. Not any stick mind you but one my friendly builder Barry handed me while renovating my parent’s home. “I’ve got to show you something”, said Barry. We walked over to a stack of 2×4’s where one stick laid to the side. “Look at the grain on this board, it’s perfect.”
Sure enough this had to be the finest 2×4 I’d ever laid eyes on; creme white, no runout, tight and consistent grain lines showing perfectly vertical to the face. Barry rubbed him chin, “There’s just no way I can put this board in a wall. I thought you might be able to do something with it in your instrument shop.” Sure enough Todd’s wizardry took one 2×4, sectioned and carefully joined pieces to make two arch tops. They were beautiful..
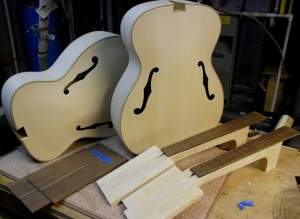
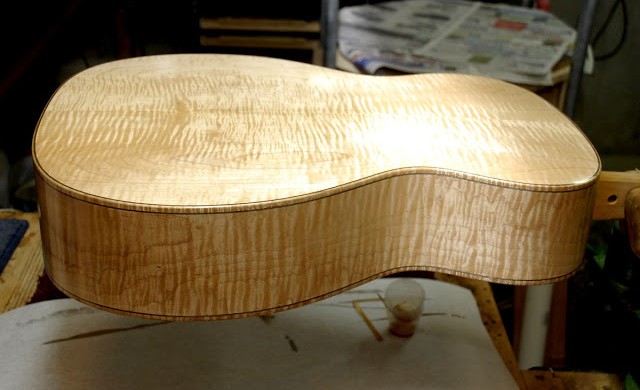
Prior to neck carves, bodies in white, the Octave Mandolins take shape.
Over the next four months Todd and I would gather, working on the design (which we drew up from scratch from photos) and slowly advancing the construction. I would haul bits and pieces back to my shop so I could make progress when not at Greenridge Guitars. Todd named them, Octoman #1 and Octoman #2, which seemed to stick. While twins, I carved the necks slightly different, mine to my preference and Todd’s (Octoman #1) to his. Octoman #1 received a Gibson style heel while I preferred the classical heel design.
We each carved our own arch tops, Todd’s being perfectly symmetrical with great recurve and mine being carved to tap tone be damned the specific graduation measurements. The instruments received asymmetrically designed mirror image head plates, and our corresponding shop logos. Finally Octoman #1 received a 2 color burst over amber, with a lighter brown tone. This played well to #1’s slightly more pronounced curl figure and coincided well with the violin finish on the back of the neck.
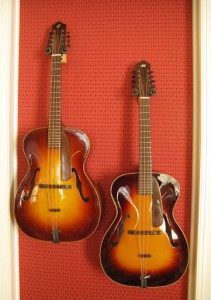
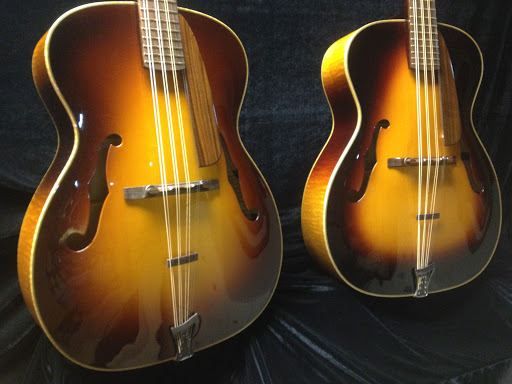
Octoman #1 & #2 share a brief time together after birth.
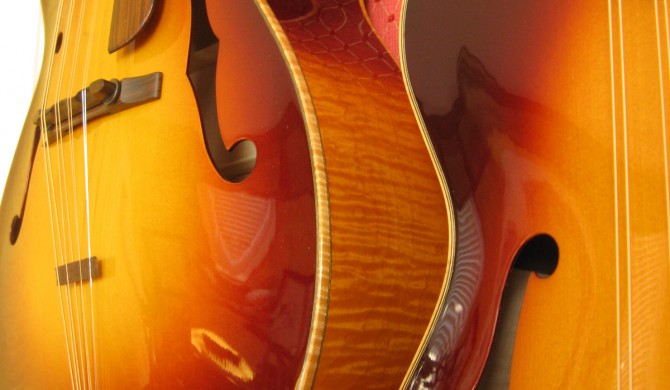
With a three color burst to a dark tobacco brown, Octoman #2 showed a more pronounced burst with more red transition and a figure eight burst on the back of the neck. Between the pick guards we designed, the custom bridges in Pao Ferro, beautiful head plates, killer curl and finish, I must say these mandolins were a sight to behold. Octoman #2 was spoken for at the beginning of construction – it was delivered to an extremely talented and promising teenage artist in Colorado already cash positive with his gigging bluegrass band.
Separated at birth, Octoman #1 will likely stay on the east coast, with one of Greenridge Guitar’s customers. Briefly played as a pair upon birth, but separated shortly thereafter. Will they ever have a reunion? That I can not answer but like with many things, the value was in the journey not the end product. Now it is time for the new owners to make their own journeys with these instruments!
See more of this instrument.
Jan
12
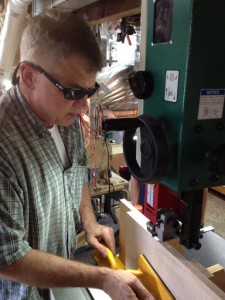
The future is so bright Todd has to wear shades.
I recently had the pleasure of building an octave mandolin for a luthiers competition. Actually it was two mandolins, co- building with Todd Stock. These were identical twins, made from the same cants of wood yet with the nuanced variations that one might find in actual twins.
I’m not sure who did what work at this point, though undoubtedly Todd likely outran my pace as his ability to progress through research and construction is something to behold. I mostly tried to keep up and filled in the many bits and pieces of work necessary to finish two instruments. There is never lack of work in luthiery.
The competition was a great experience. For starters it gave Todd and I an opportunity to build something together – for as many years as I’ve known Todd, I’d never built with him. Oh, I’ve shared a chisel, a hand plane and no lack of tears repairs to my instruments. But nope, never built an instrument with him end to end. Secondly we were headed deep in to new territories, neither of us having built an acoustic arch top much less a mandolin.
And I have to say it was a blast.
Laying out the top carve topography.
Upon considering the competition, Todd’s suggestion was that we build octave mandolins. My reply was succinct, “Huh”? Being a good sport while simultaneously ignorant about the mandolin family, I set about Google and Youtube listening to search results. After staring at a handful and listening to a few more I came back to Todd, once again somewhat frank, “Todd, why do you want to build an octave mandolin? They look ugly and I don’t really care for how they sound.” Todd replied, “You haven’t look at the right one. Check out Sarah Jarosz.” Todd doesn’t really have any annoying traits – he’s a great conversationalist, a patient teacher and a perfectionist which he does not apply as a standard to others but to himself. That said he does have one annoying trait – with encyclopedic knowledge and a student of anything that interests him,Todd is most always right. Sure enough, the Jarosz recordings on Fletcher Brock’s octave mandolin were in a class of their own. “That’s a cool octave mandolin, Todd, I’m up for this.”