Aug
18
[this is the first article of a two-part series. The second article can be seen here]
A recent Martin refret provides a great backdrop to discussing what makes desirable in fretwork for the guitar player. This articles focuses on fret issues along with what a player desires in good fretwork. In a second article, I share my process for producing excellent frets and a well-playing guitar .
What Musicians Desire in Great Fretwork
Often guitar players may not realize their frets are responsible for less than desirable playing. After all, guitar players are used to the way their guitars play. As the frets slowly worsen, the playing experience degrades little by little, the guitarist becomes the proverbial frog in the boiling pot. Inevitable fret wear, humidity, and original construction approaches are all possible contributors.
Worn or uneven frets present three possible outcomes:
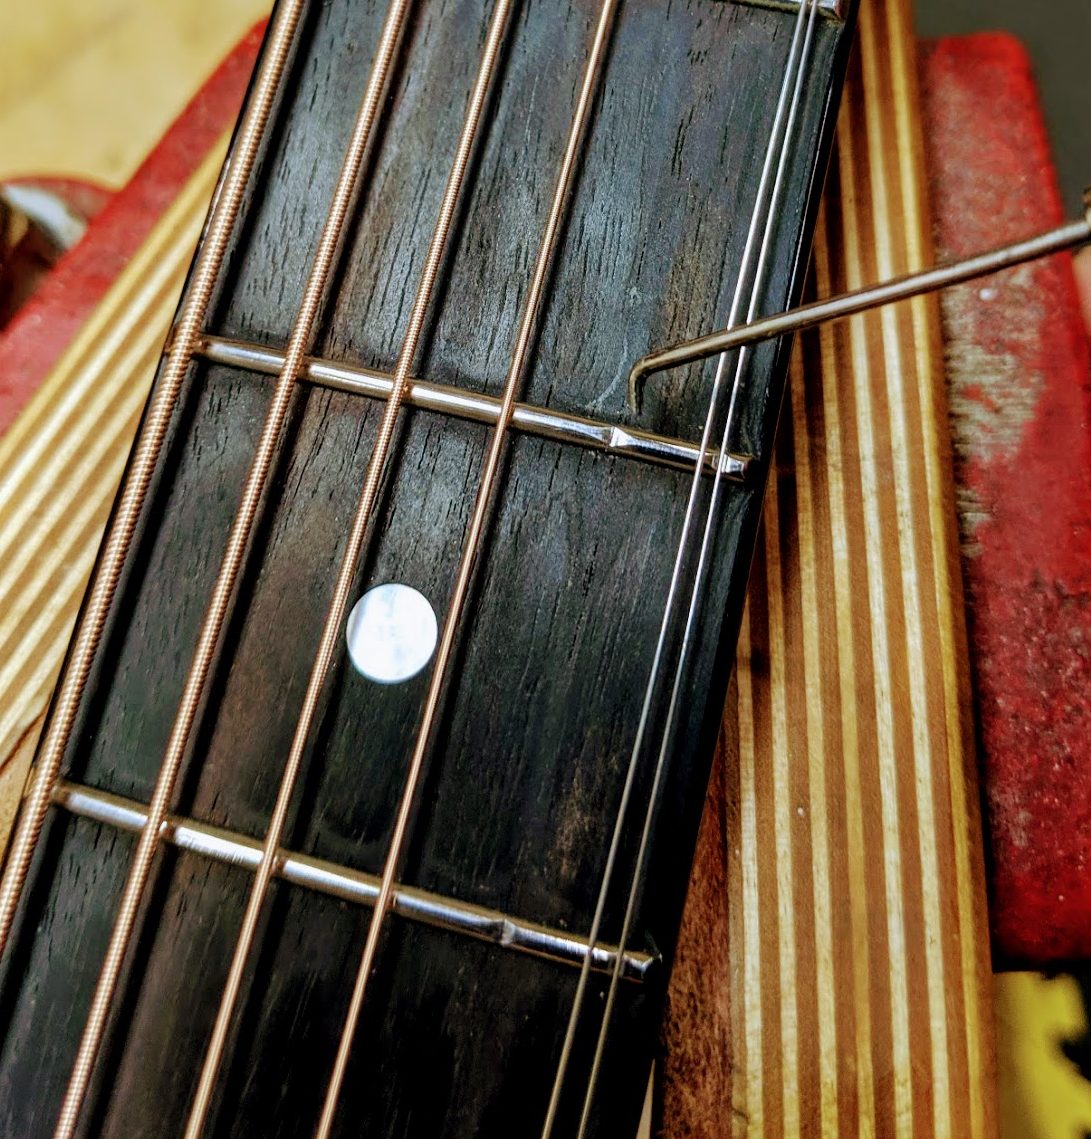
- Intonation issues: fret wear causes the string to fret forward of the fret crown peak, shortening the string length and causing sharp notes.
- Fret buzz: a fretting a string on a significantly worn fret can lower the string such that the next fret (with less wear and more height) makes contact with the string when struck. High frets resulting from inconsistent fret installation or loose frets are also buzz producers.
- Difficulty playing: fretting strings over inconsistent fretwork causes muted notes and left-hand fatigue. Often excessive neck relief (too much bow) and high saddle height compensate for inconsistent fretwork (more space under the strings reduces the likelihood of buzzing.)
As musicians, what would we like from our frets? Primarily three attributes:
Accurate frets – Properly installed, fully seated, and crowned at the exact same height. Accurate frets are the foundation for a well set up guitar.
Comfortable left-hand play – When frets are accurately installed, the string height at the nut can be minimized, making fretting on the first several frets far easier. Neck relief (neck bow) can be reduced, improving mid-neck string feel and reducing fretting effort. Finally saddle height can be reduced, improving upper register fretting.
Durability and stability – Selection of fret material directly relates to wear. While most guitars come with nickel frets, two longer lasting materials are available.
- Evo wire, with a gold-colored hue, tends to last 50% longer than nickel. It’s formulation adds 20% zinc in place of copper for greater wear resistance.
- Stainless steel frets can also be installed, which often last the life of the guitar with no need for replacement.
Both of these alternate materials are more expensive to install, but return value on far less frequent fret work in the future. Finally for stability, frets should be glued in place during installation. This helps ensure a lack of fret movement, thereby not introducing high frets (and fret buzz) over time.
The next article, The Road to Great Frets, shares the fret installation and setup process which achieves the above attributes.
Dec
17
In the last article I discussed the benefits of an 18-hole bridge. The next question might be, how does one go about stringing one up? Here is an easy step-by-step guide. Let’s start by looking at the hole configuration. There are 3 holes for each string. The left upper hole as well as bottom hole go all the way through the tie block. The top right hole goes half way into the tie block and is used to capture the string end.
In the guide below we are going to string the 4th (D) string.
Step 1 – Start the string-up.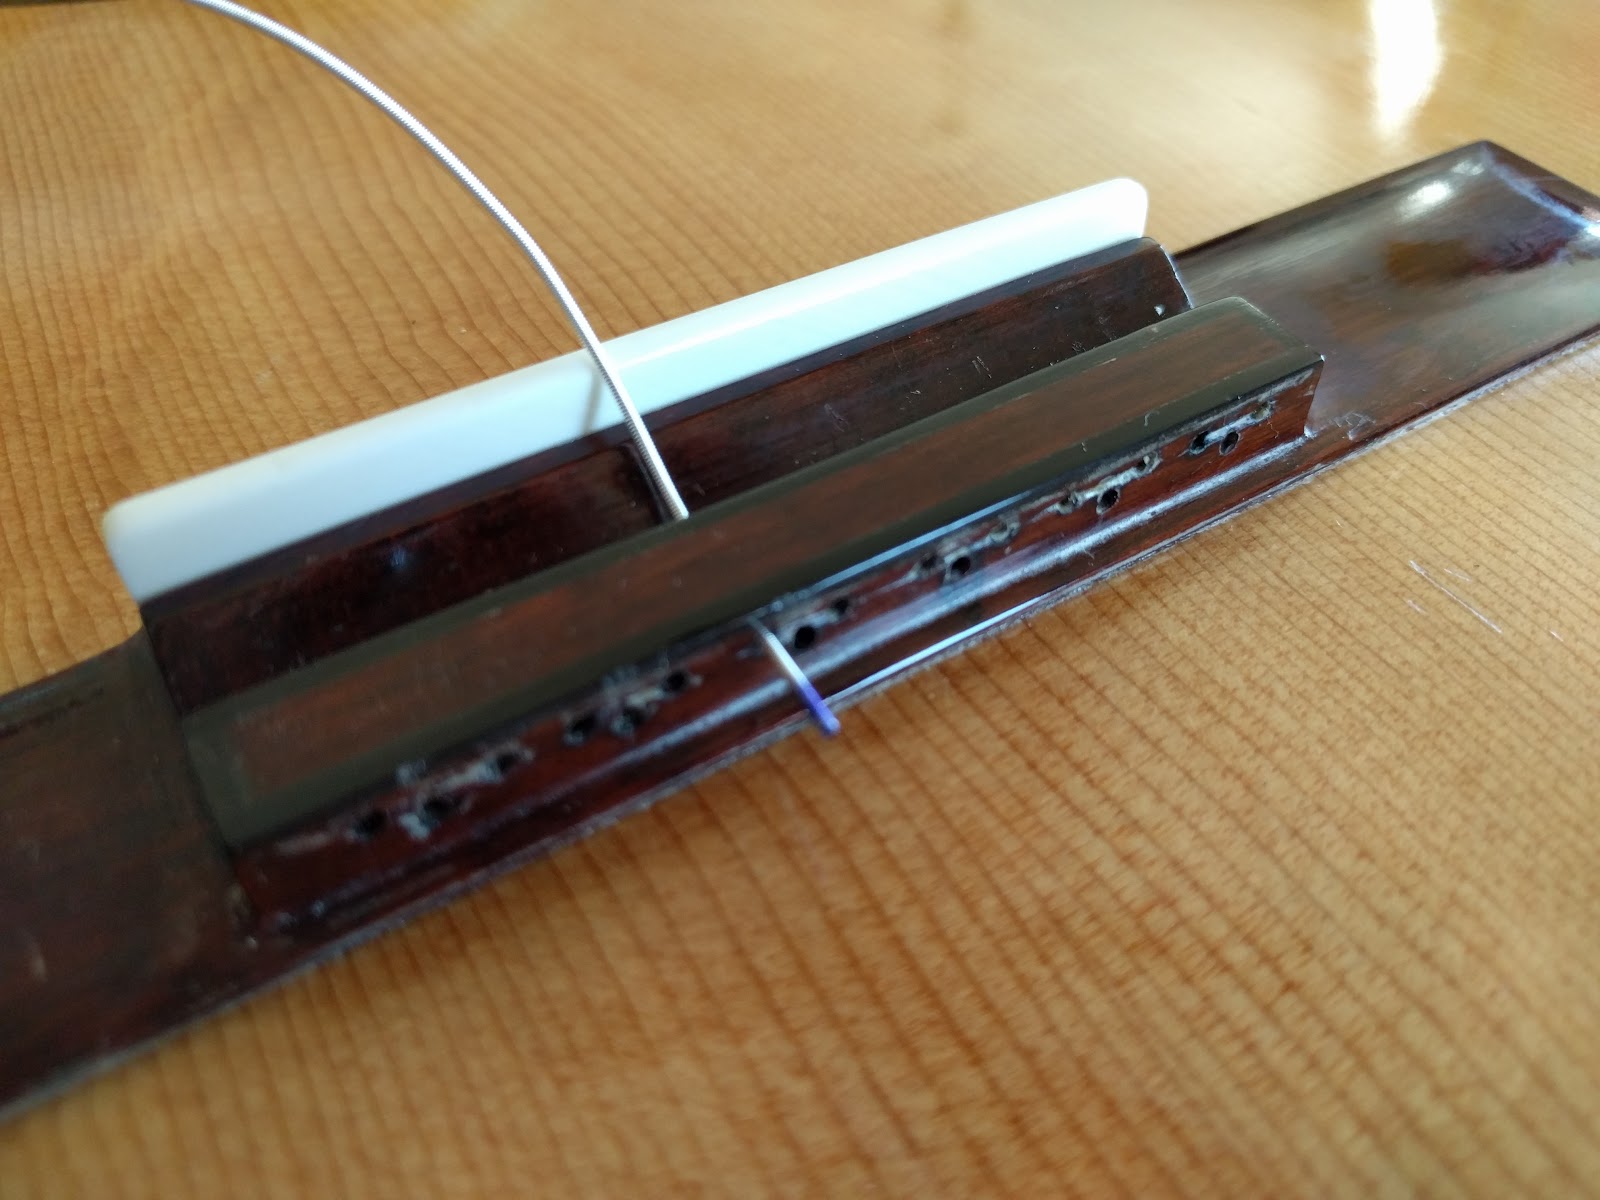
From the front of the tie block, insert the string in the bass-side hole.
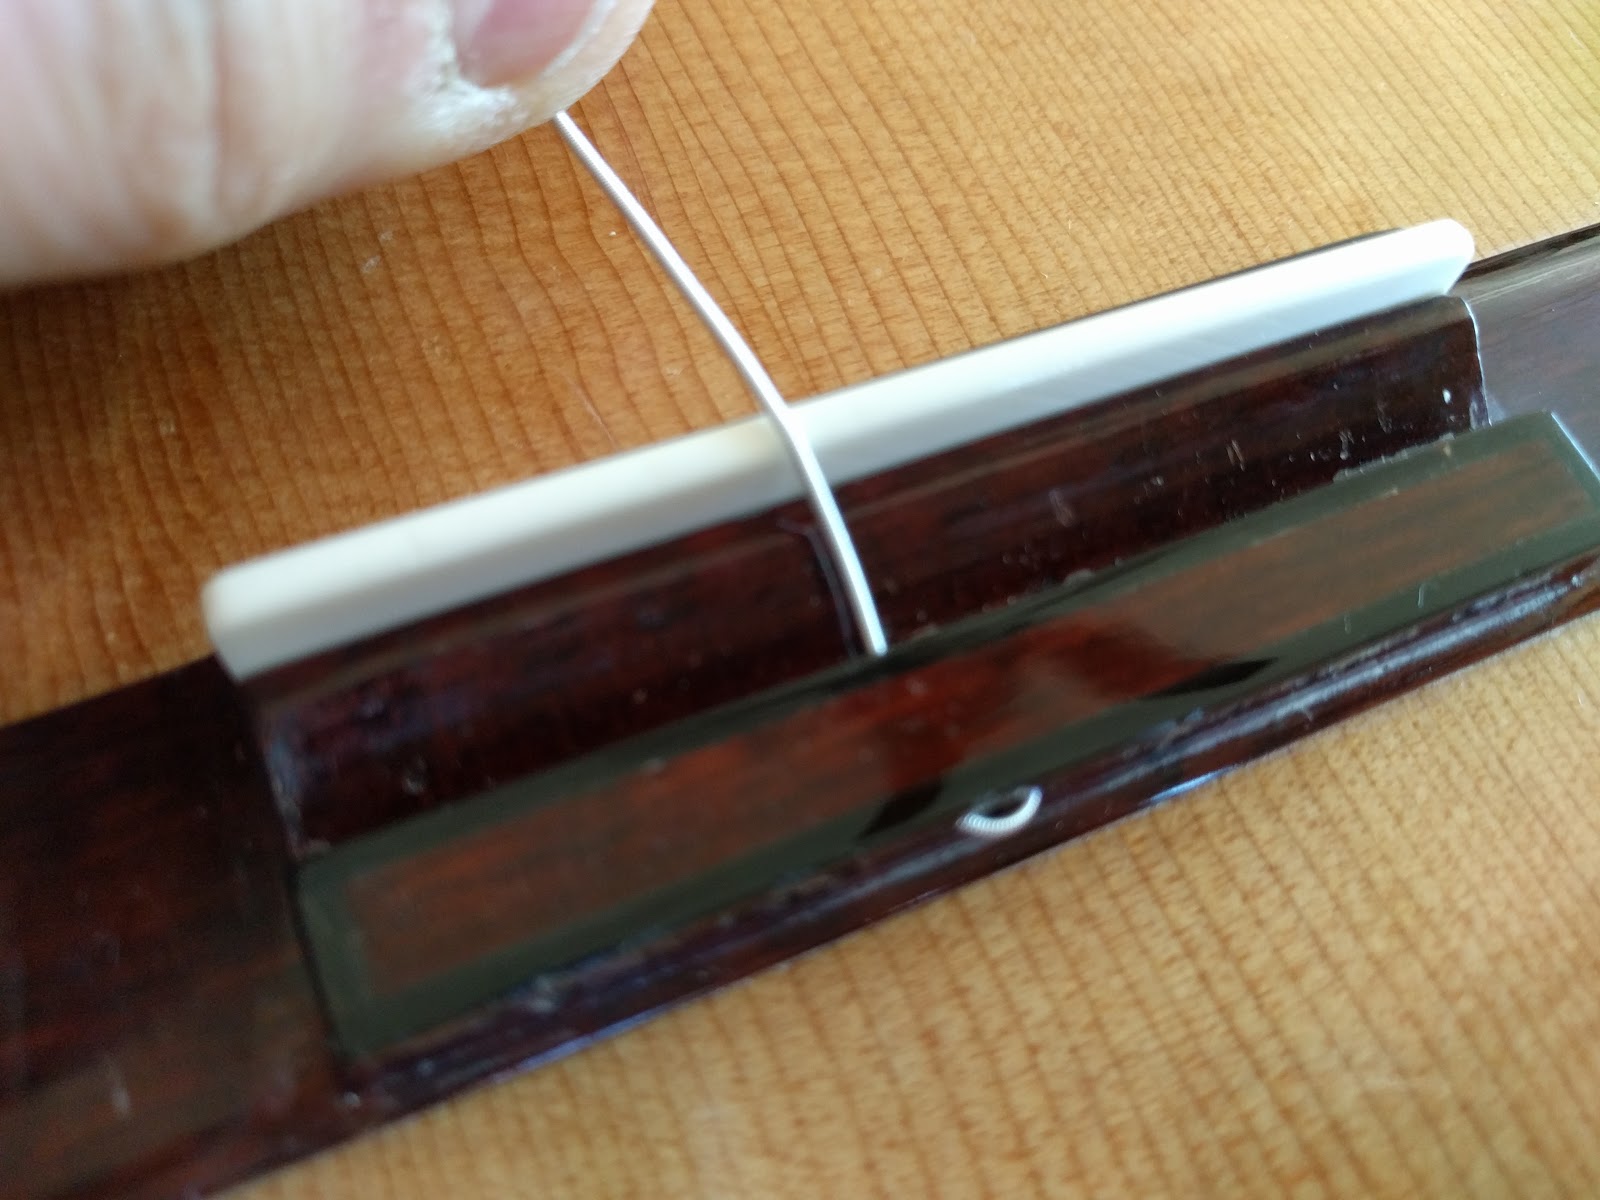
Step 2 – Bury the string end.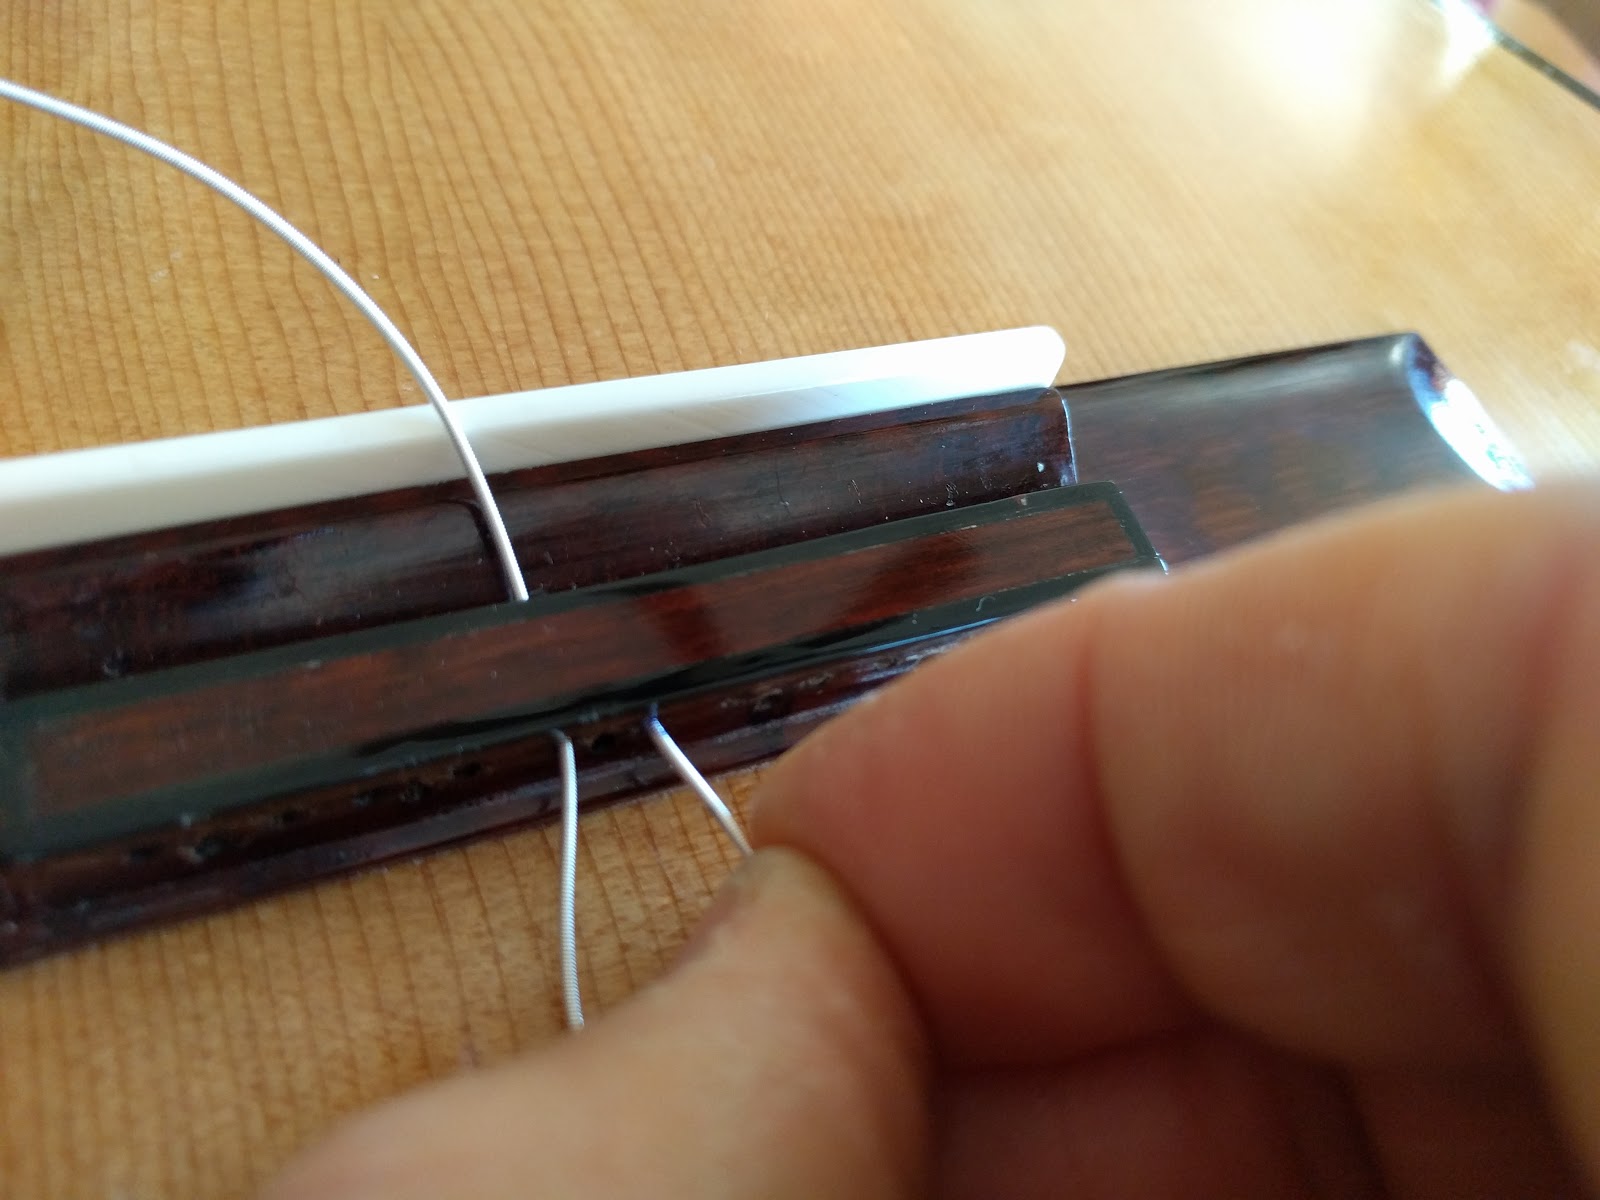
The treble side hole is the “half-hole”. Insert the end of the string into the half-hole until it stops.
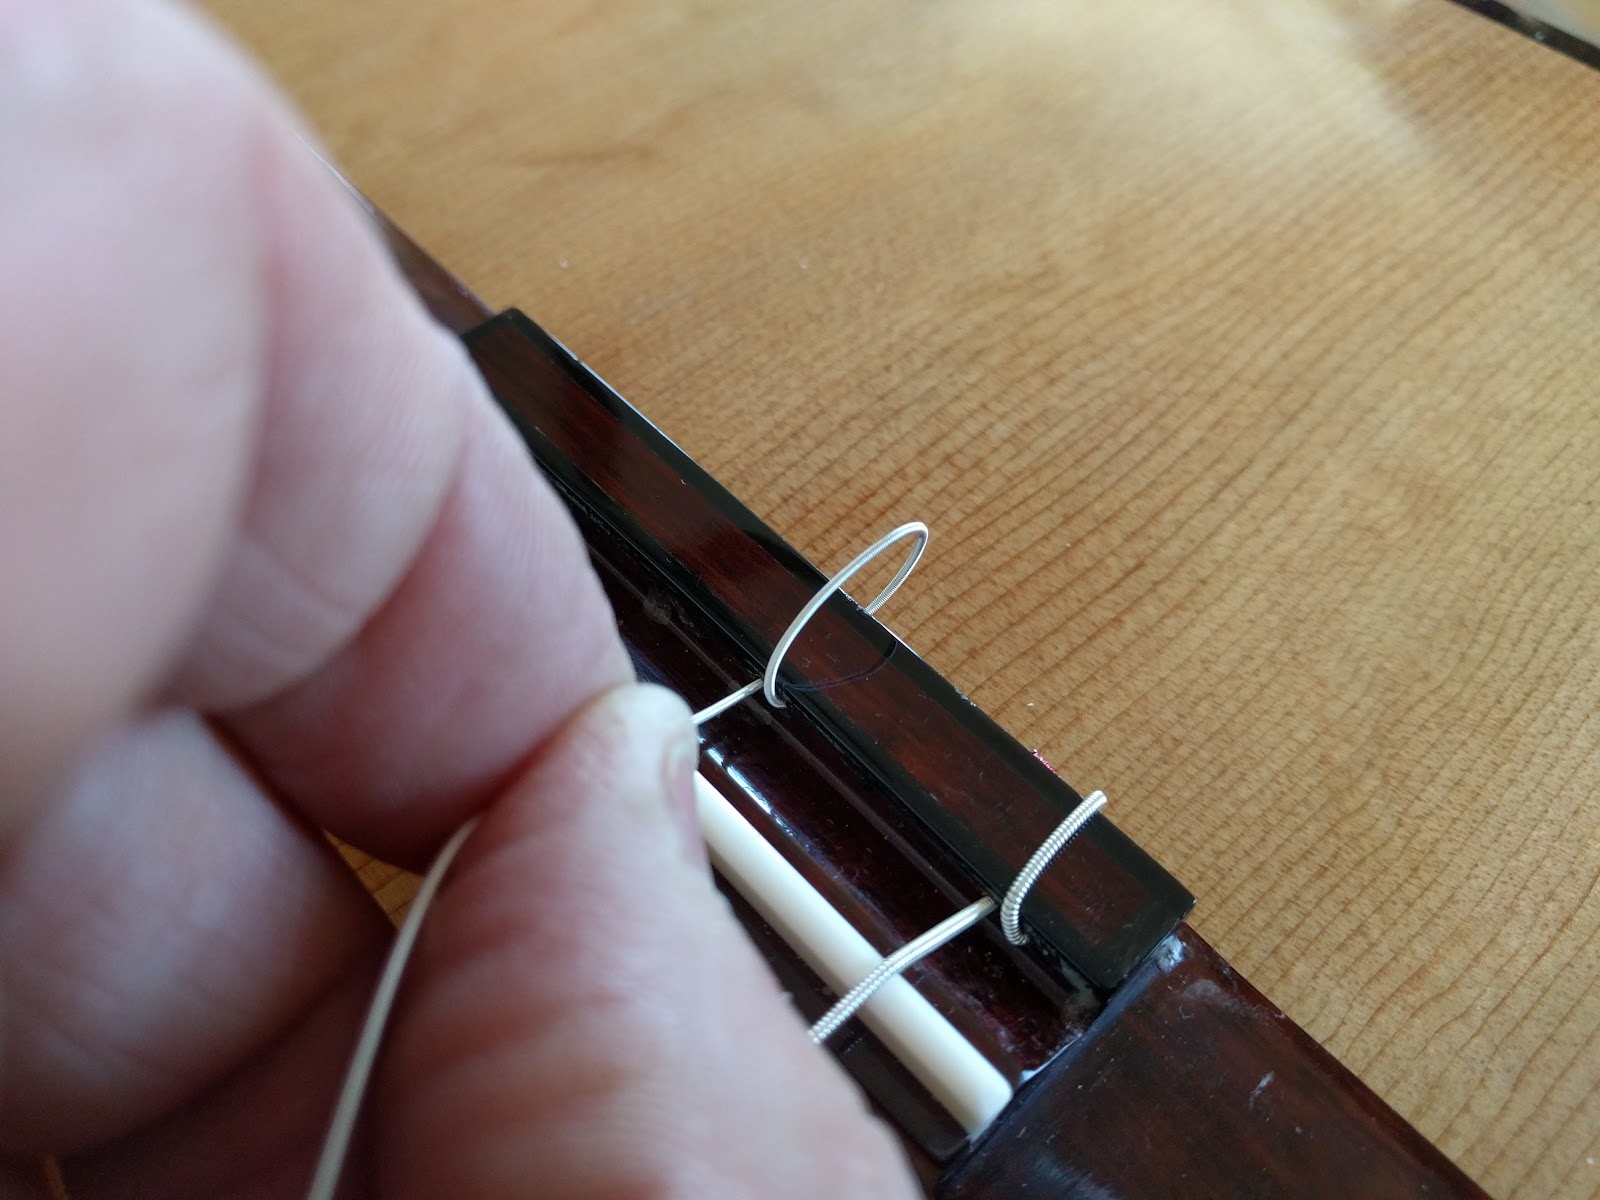
Step 3a. Lock the string.
Pull on the string, taking up the slack.
 Step 3b.
Pull until the string is taut along the back of the bridge.
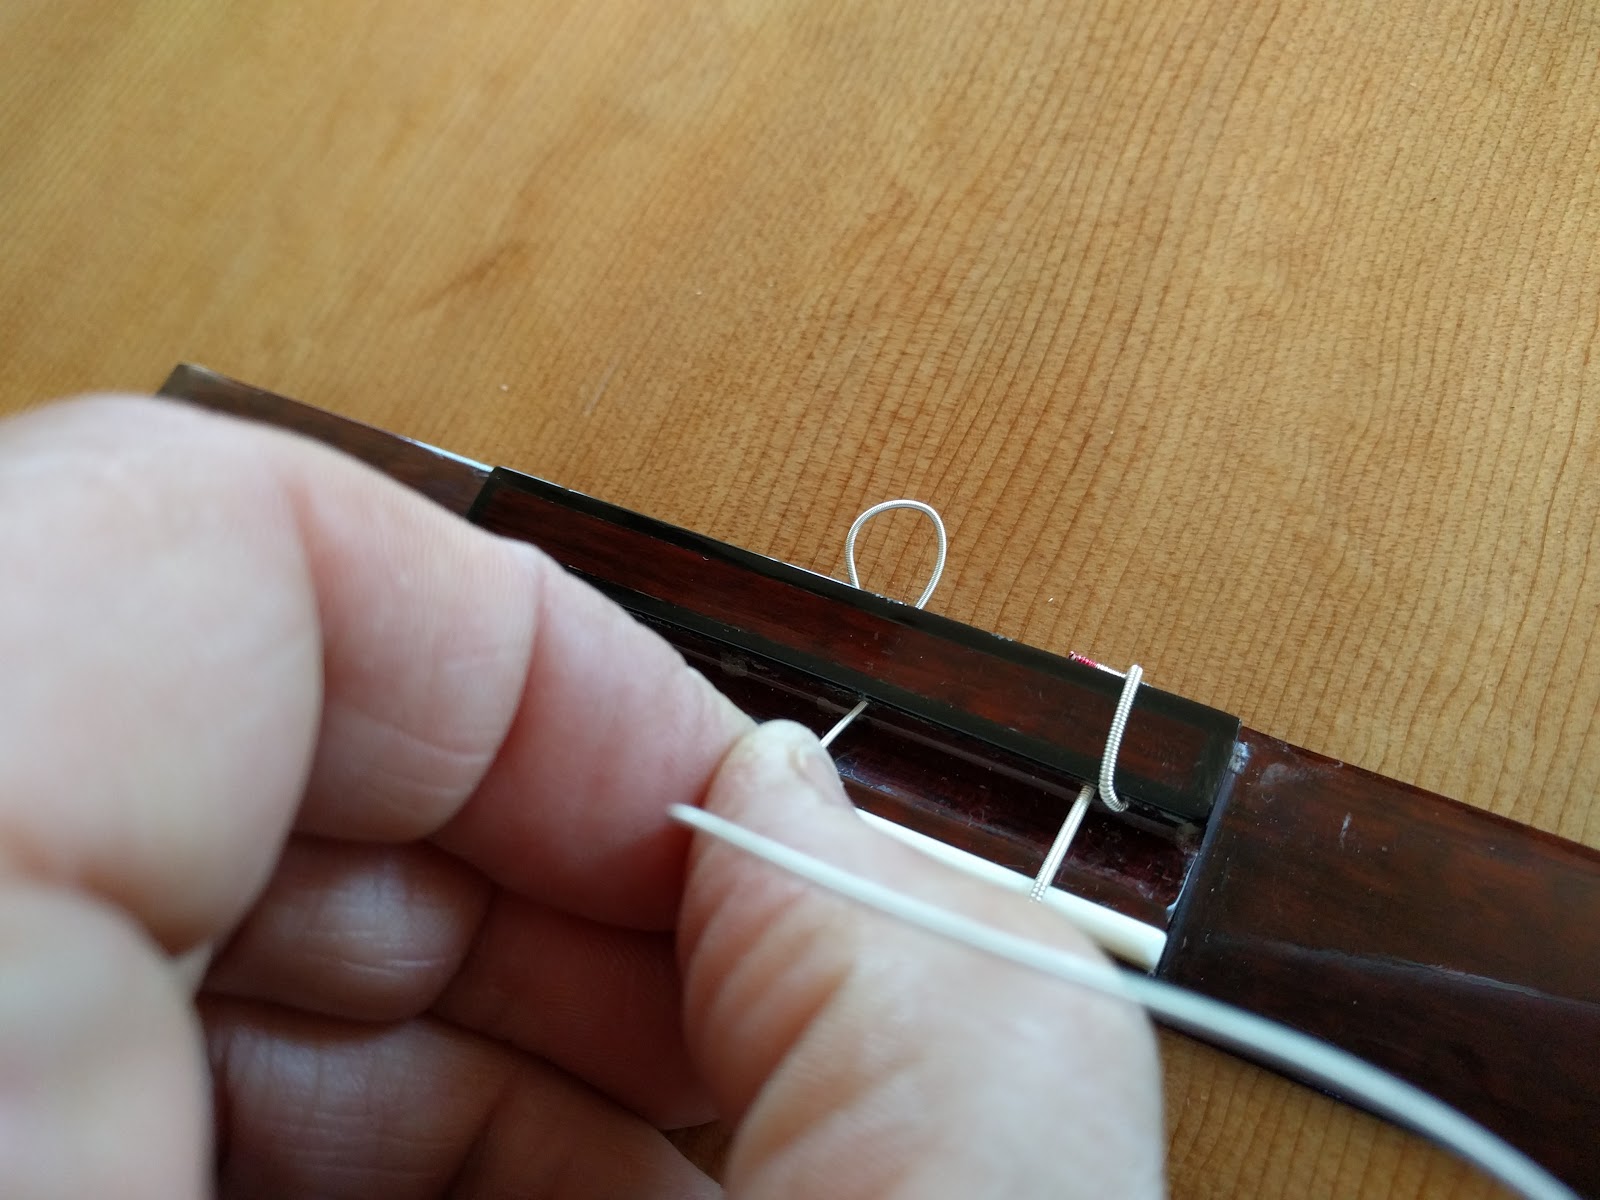
Step 4a – Wrap the string.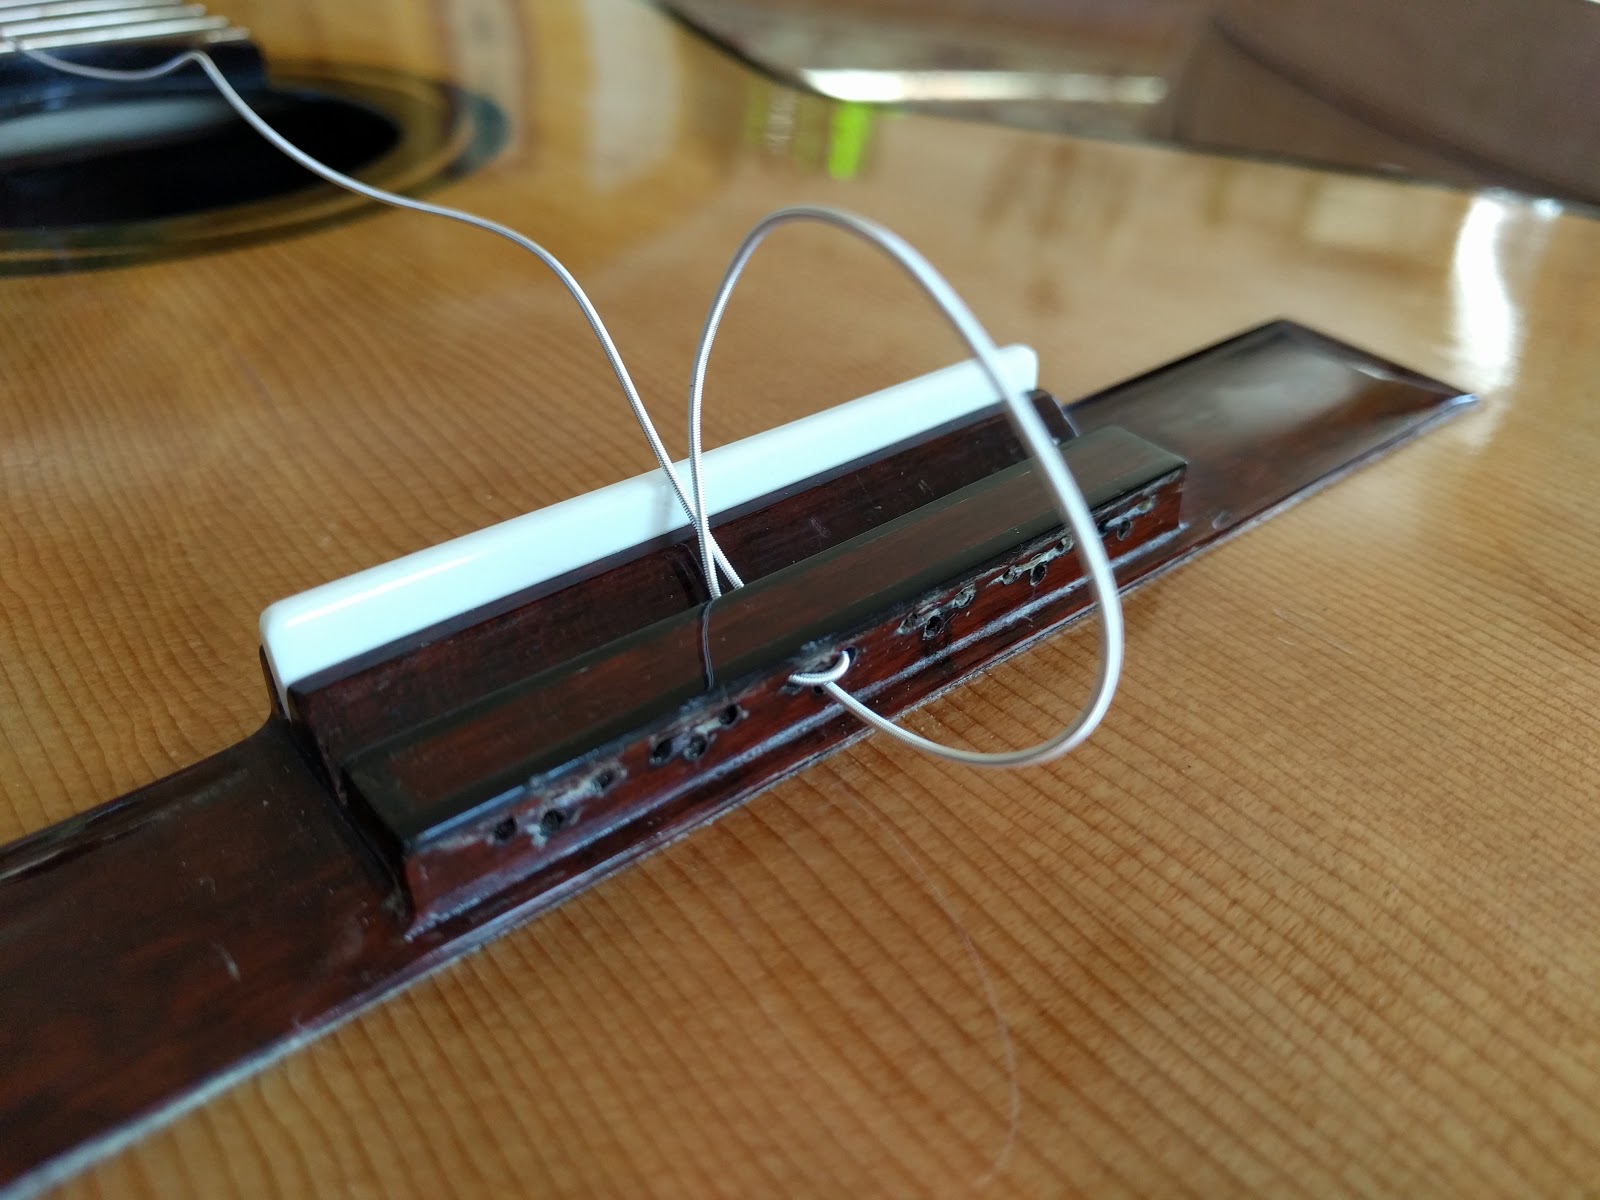
Take the other end of the string and insert it from the back into the lower hole.
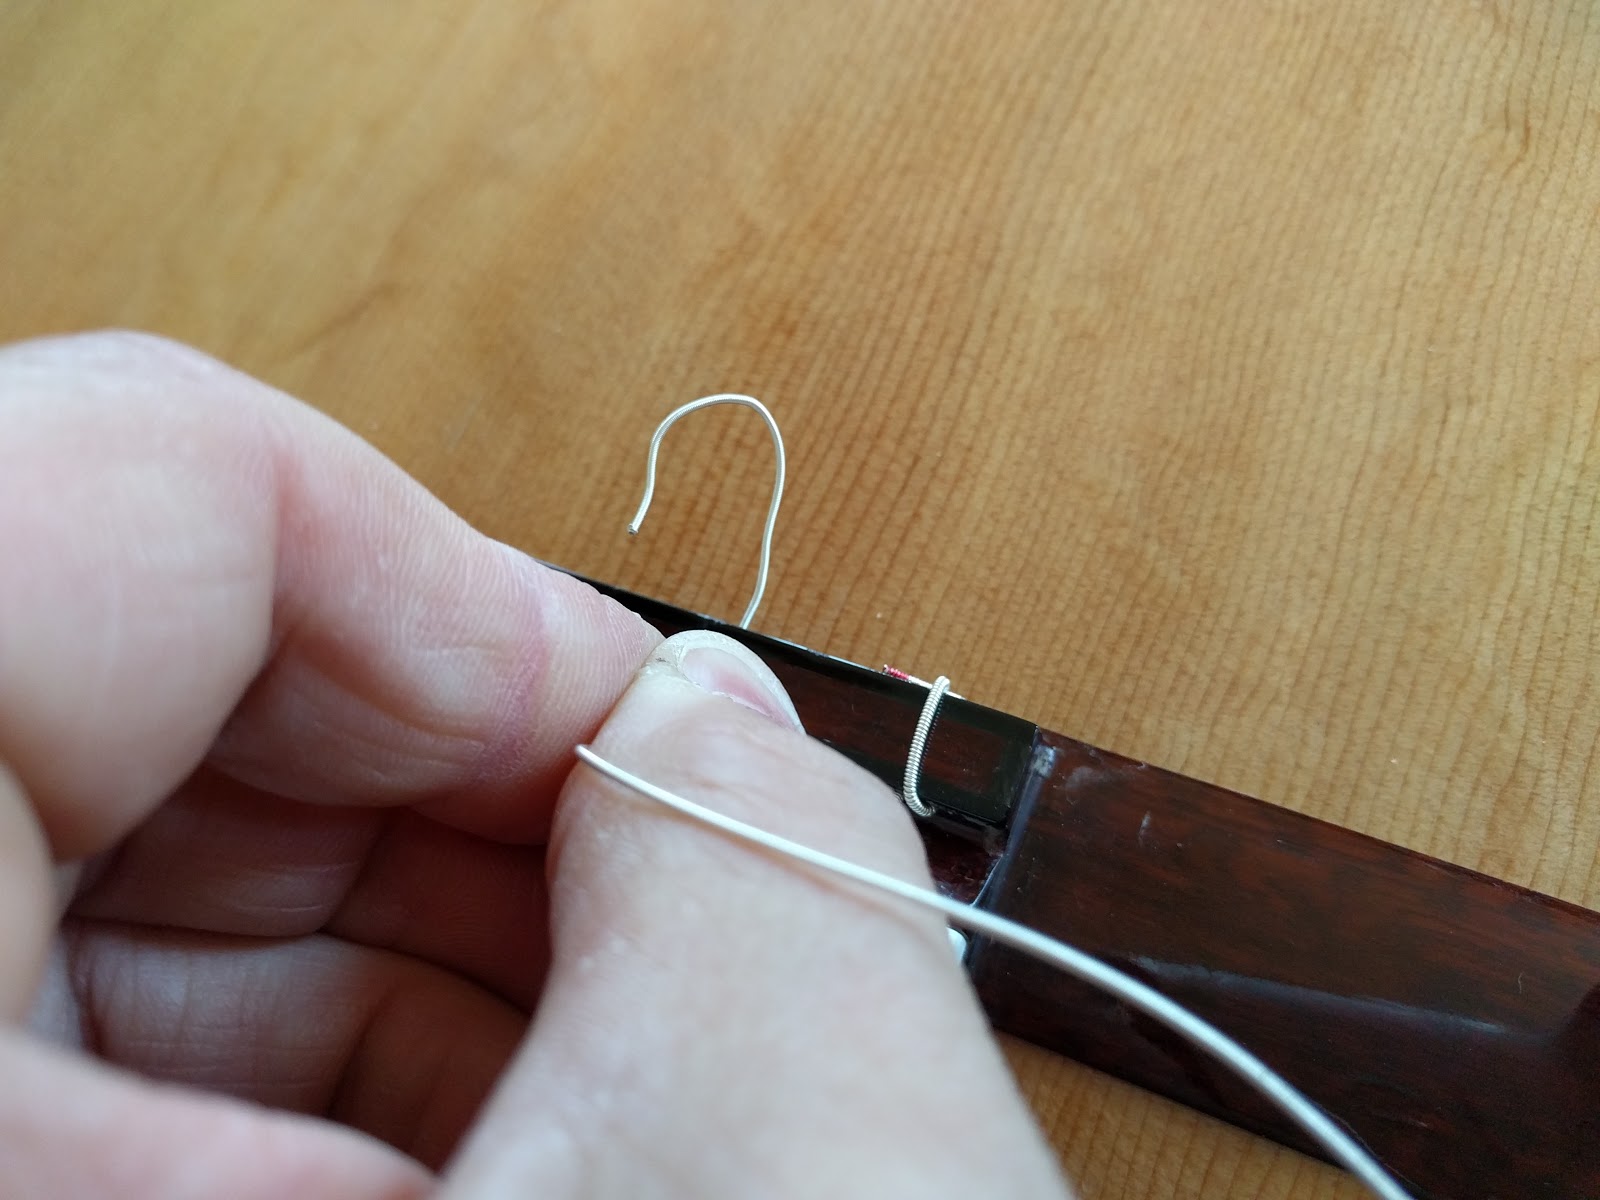
Step 4b.
Pull the string through so it creates a loop over the tie block.
Step 4c.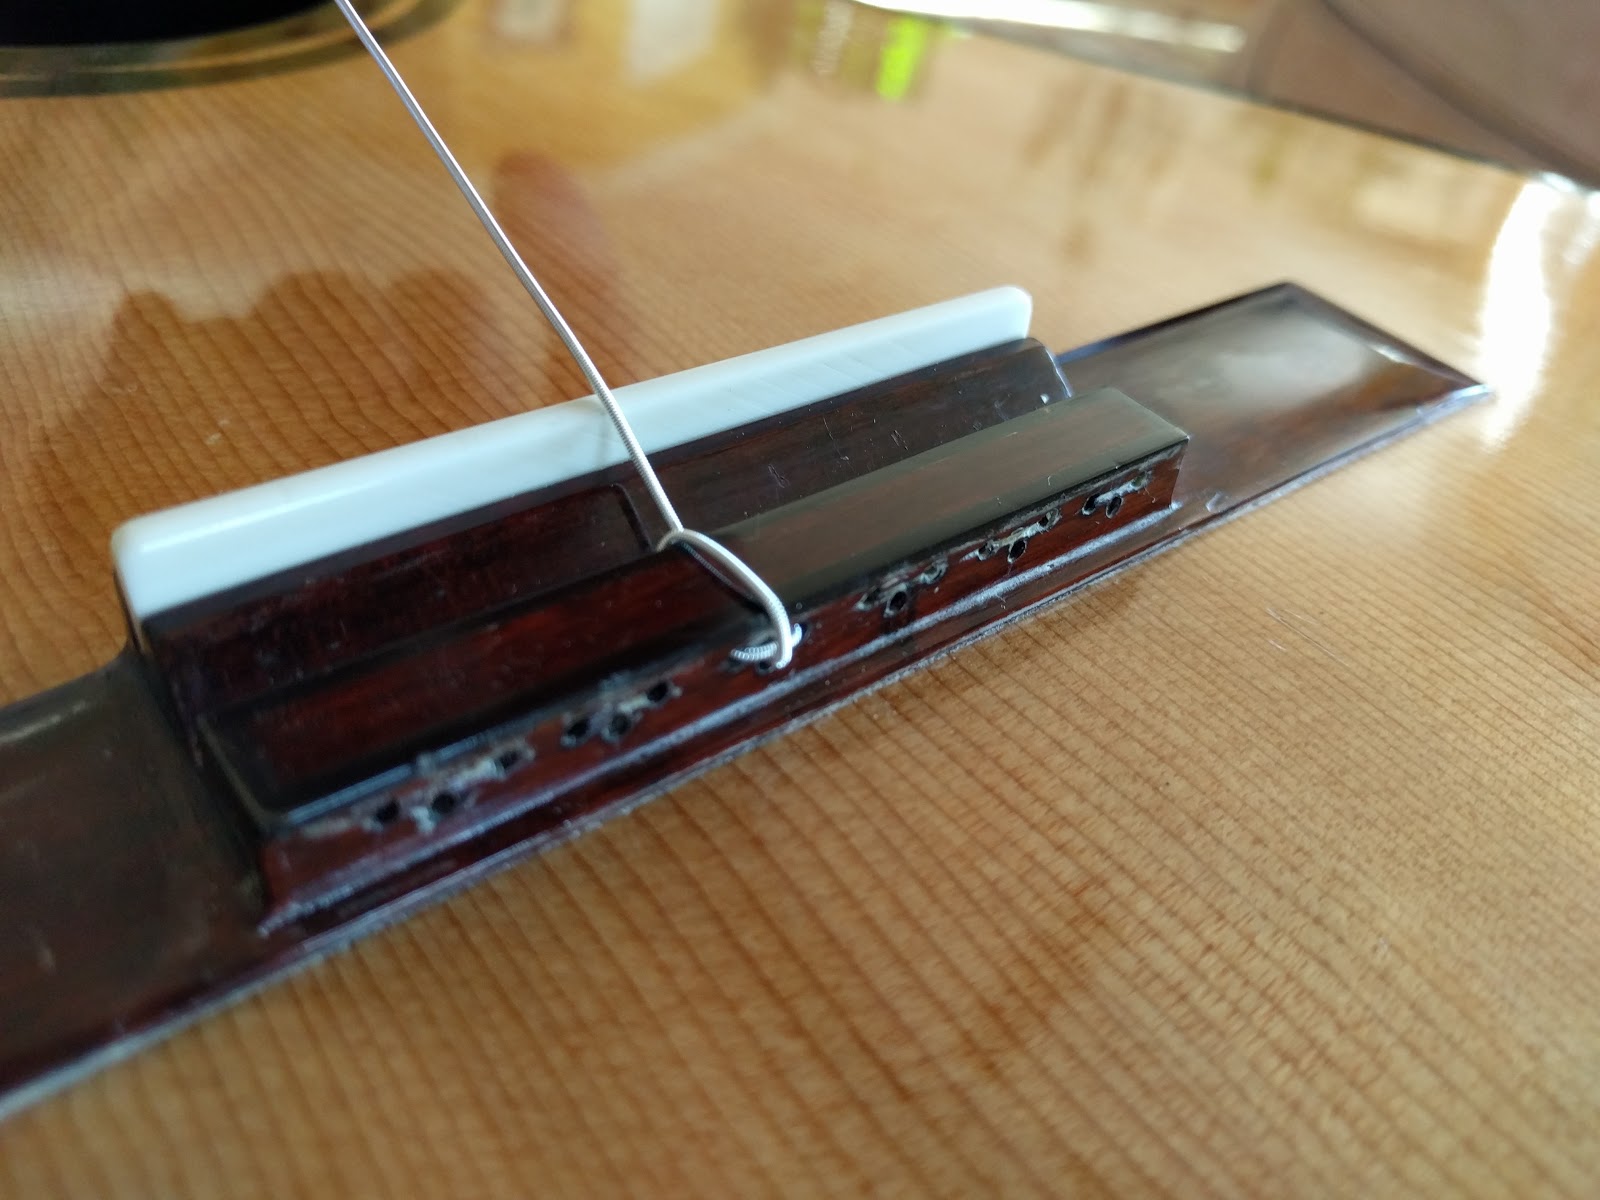
Finish pulling the string until it is taut over the tie block. Notice two things – first how the wrap locks the string into place at the back by vertically crossing the string. Secondly note how low the string exits the front of the tie block, providing more than adequate break angle over the saddle. From here, you simply string the other end up at the tuning machine.
Complete. 
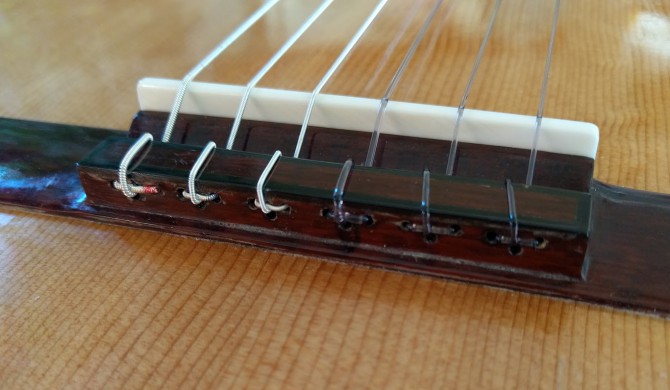
When all six strings are wrapped, the bridge has a clean look, with a single string over the tie block and no string ends exposed in the back.
Very simple, foolproof, and keeps your top safe from string slap. But with that said, how does one remove the string? Simply grab the string from the saddle side and push toward the back until it is all the way through (first photo). The string unloops from the tie block. Once again press the string from the saddle toward the back, and the string end will push back (photos 2 & 3). Simply pull the string through and it is removed.
Mar
05
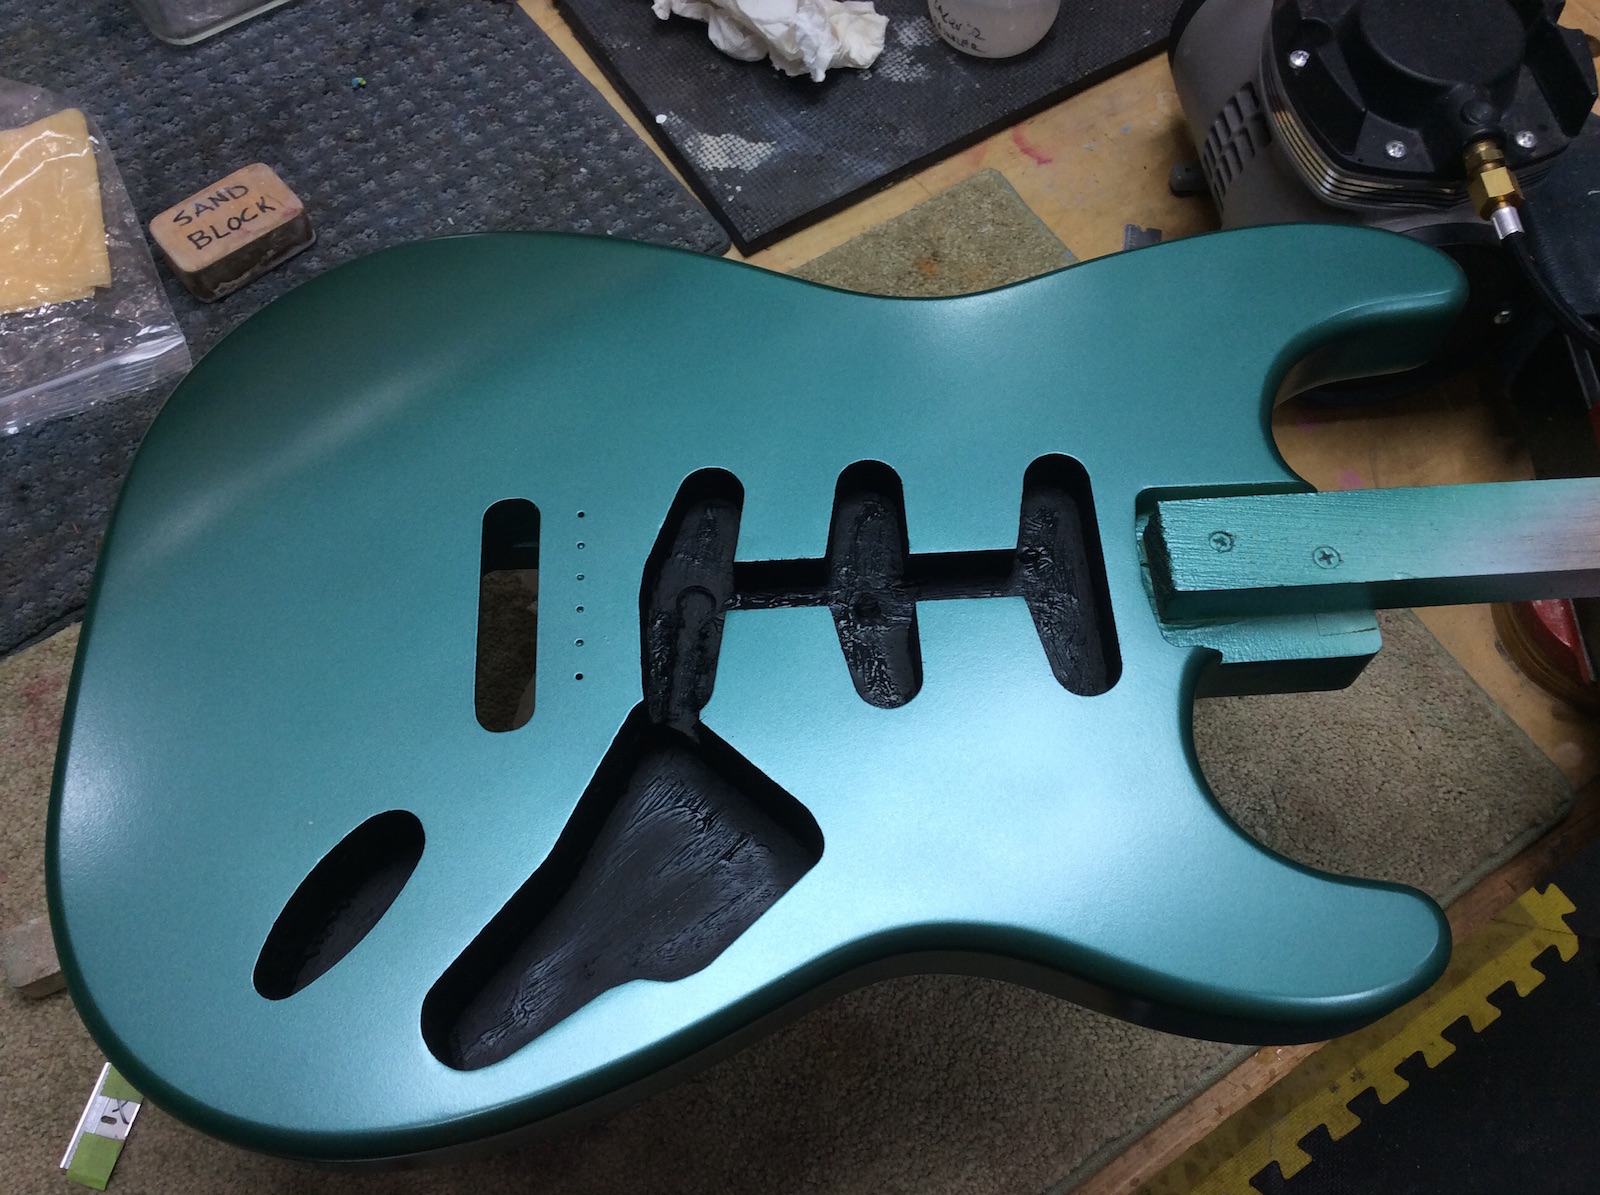
Strat in Gibson’s Inverness Green Metallic
Undoubtedly the Fender electric guitars from the 50’s are some of the most iconic instruments ever made. This past spring I decided to make a series of tele and strat style guitars, in homage to this classic design. But to make things interesting, a few twists to make them special for their ultimate owners.
The bodies are all made from Alder, selected for quality and weight. The necks are Eastern Hard Curly Maple, finished in amber for that vintage “found this gem in a closet” look. Speaking of finish, I selected nitro lacquer colors that are period traditional, rarely seen, yet gorgeous. Finally the hardware is nearly all American made boutique – the finest one can find, with pickups custom wound for each guitar.
All in all there are 6 guitars in flight. A strat on order from a client in Inverness Green Metallic, a Burgundy Mist Metallic tele, two Curly Maple over mahogany body guitars that will be nitro bursted. Finally my favorite – a matching pair, tele and strat, in a rare Capri Orange color with white binding and hardware details.
Eastern Hard Curly Maple
Curly curly maple
I am a big fan of Maple necks for guitars, including acoustics. If Maple is good enough for violins, it is good enough for guitars! Eastern Hard Curly Maple is a superb neck wood – elegant with visual depth, bright and clear tone which mellows slightly over two to four years of playing. An electric guitar is acoustically influenced more by the neck than the body, making the neck especially important to the overall sound.
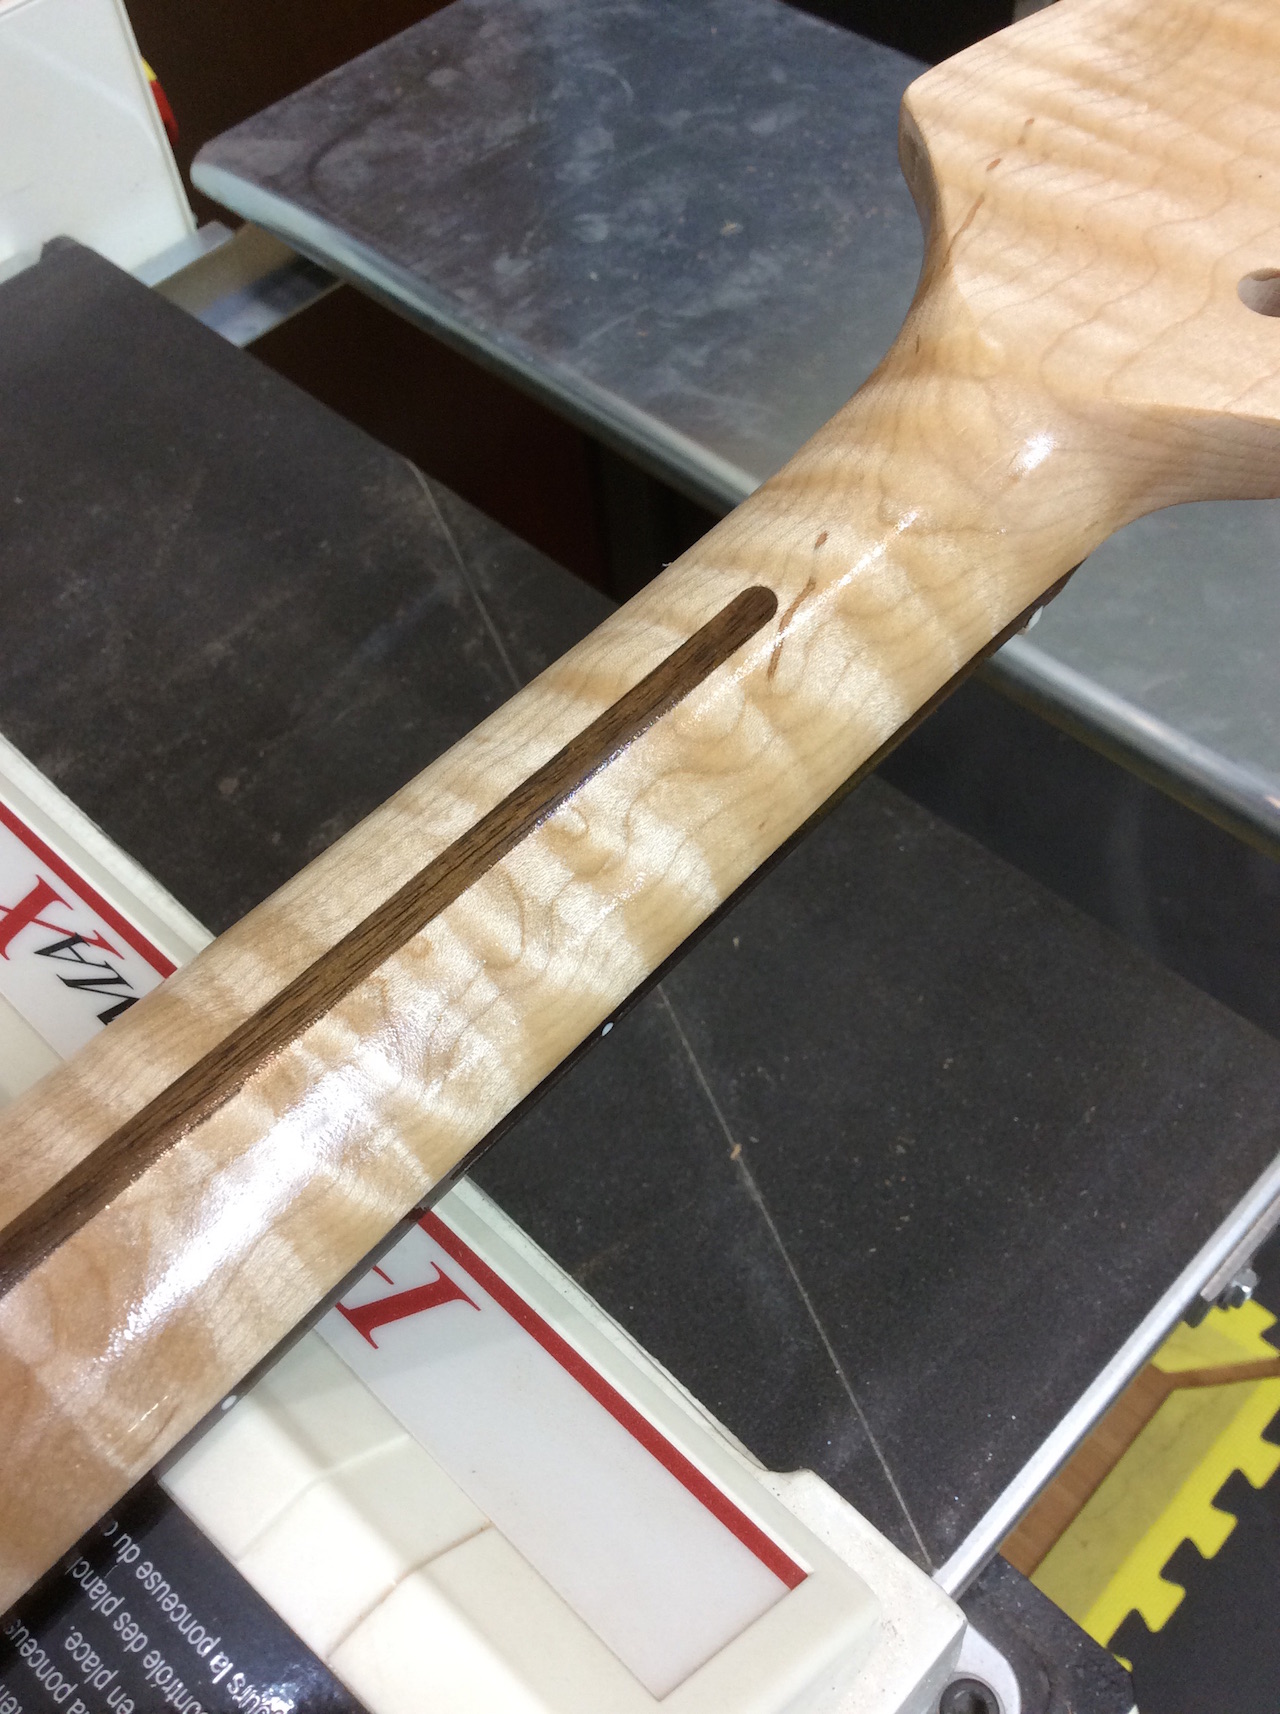
So yes, the necks are curly, with rosewood fretboards, abalone fret markers and rosewood skunk stripes. They are completed with bone nuts and Gotoh staggered height adjustable vintage tuners, which in my opinion are the finest quality vintage style tuning machine.
Hardware bits
No corners are cut with the hardware. The highest specification components are made in the USA. One exception is for the Gotoh vintage tuners, as the Japanese product is simply the best quality in my experience doing repairs. The bridges and saddles are custom milled by Callaham in Winchester, VA or Rutters in san Diego, CA.
Pickups are hand wound and individually ordered from a crew I work with out of North Carolina. The rest of the hardware all American made from CTS, Switchcraft, CRL and Oak Grisby. It costs more to build guitars this way, but the end product is uncompromised. Of course all wiring is vintage pushback with oil-filled boutique capacitors, high tolerance pots and finally treble bleeds to keep tone balance across the volume range.
A Few Attentions to Detail
Since many of my clients play on stage, and single coils are the noiseful bane of every stage musician dealing with fluorescent lighting, careful attention is paid to shielding. Specifically the bodies are shielded using a special shielding paint in cavities and wire channels, which is then locked in during the clearcoat stage. Pickguards are shielded in copper, and ground wires connect the shields to the circuit ground.
Necks are carefully finished, dressing fret ends and ensuring smooth fretboard edges for comfort in playability. The bottom of the neck pocket is cleaned and leveled, ensuring a tight connection and proper angle for correct saddle height adjustment.
Finishes are very thin, allowing for the instrument to be resonant. It would be difficult for a factory to finish guitar in nitro lacquer as thin as I do, and warranty the instrument – one of the differences of a hand crafted guitar. To make a thin finish requires tedious attention to careful wet sanding – body, sealer, basecoat and clearcoat. Body color matched headstock logos and Morelli neck plates round out a few small touches without interfering with the essence of these iconic guitars.
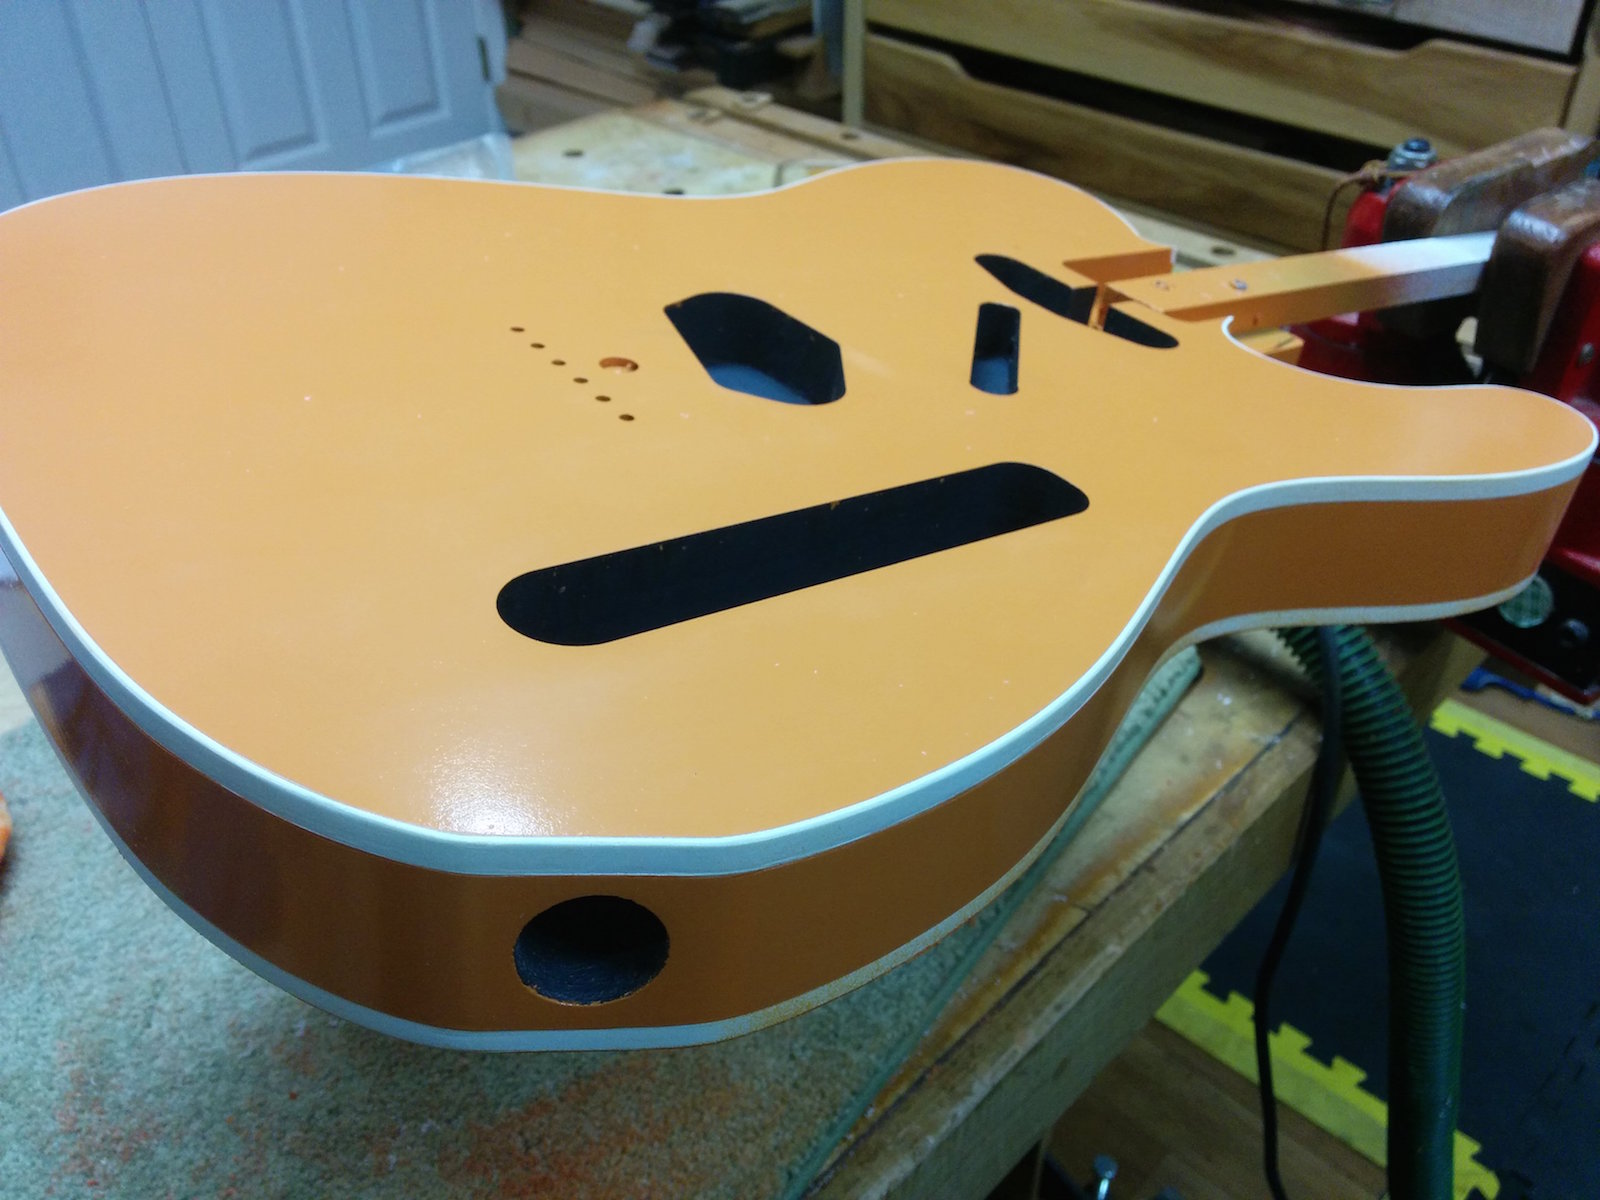
The Orange Creamsicle Set
In researching colors from the 50’s and 60’s I found that many of the Fender colors were borrowed from automobiles of the time. They are often pastels, soft in mid-tone color. Interestingly enough, Capri Orange is from a later era. For about one year, Fender painted Stratocasters in the late 70’s in this color, which is reminiscent of a childhood treat – the orange creamsicle. If one didn’t know any better, one might conclude this was a 60’s color, along with the rest of the famous Fender hues.
Once completed and in the hands of a future owner, they will be one-of-a-kind. Stunning partners with a unique look and quintessential sound of their original 50’s inspirations. Having the opportunity to work on guitars with this attention to detail in concept, style, sound and execution is exciting as a luthier. This is what brings me passion and attention into focus.
The telecaster received double white binding, set against the orange, framing the guitar’s presence. White single ply pickguards finish off the contrast. The necks are sprayed in an amber tint, with enough orange hue in the yellow translucent base to compliment the bodies. As a finishing touch, both guitars receive matching orange owl straps made by Couch in Chicago.

Final trimmings
These guitars will be protected by new Fender ABS hardshell cases which are form fitted to the bodies. While I often prefer the look of tweed cases, the new hardshell molded cases simply provide superior protection, especially for the gigging musicians where the cases are going to see a lot of public use.
As with all Morelli guitars they will come with hand-written hang tags, a numbered Morelli Guitars white pearl pick, Morelli Guitars microfiber cloth, a signed Build Sheet detailing all of the build specifications, and a lifetime warranty as is customary as I stand behind all my instruments.